HeatedSeatKits.com Heated Seat Kit Review & Installation

With winter coming (way too) soon, I decided to add heated seats to my s/o’s car, and here is my experience. Overall, so far I am very satisfied with the product, despite few minor things that I would change.

Ordering

After a little bit of research online, I came up with HeatedSeatKits.com (HSK), also known as Autowarm.com as a potential source of the kits. The kits I got were Innovative Heat II kits which cost $90 and come with 2 heat settings and are advertised as their most popular and universal model. Each kit includes two pads – one for bottom cushion and one for back cushion – wiring harness and 3-position switch.

I placed order on their website on Monday morning, via fairly simple process. The $90 includes shipping, and in addition I bought a suggested $20 installation kit, for the total of $200. One thing that bothered me a little was the fact that when I placed the order, I did not receive a confirmation email that would contain any kind of order information. However, I did not get to wonder about that for too long because, to my surprise, I found my order at my doorstep on Tuesday! the order was shipped from WA to CT via USPS and got there in one day. That’s impressive, I have to say.

As it turns out, there is a page where you can find status of the order and even order reference # using full name OR a zip code (!), but I still believe these days email is a must.

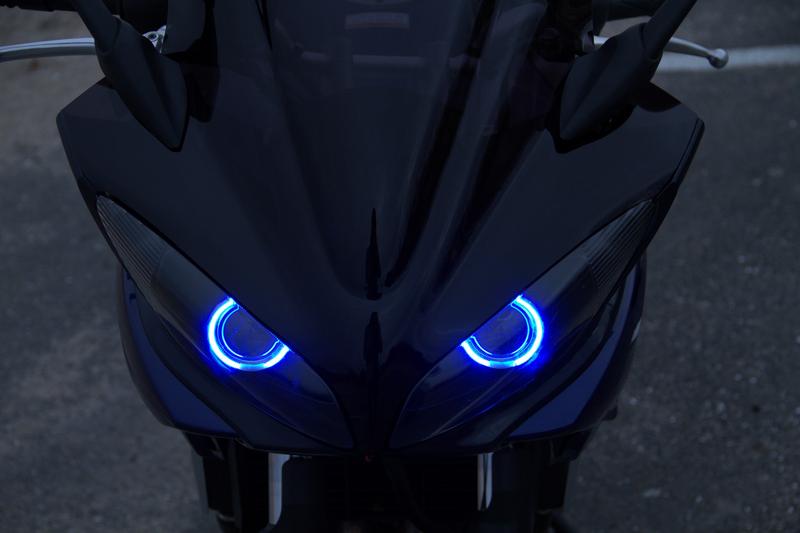
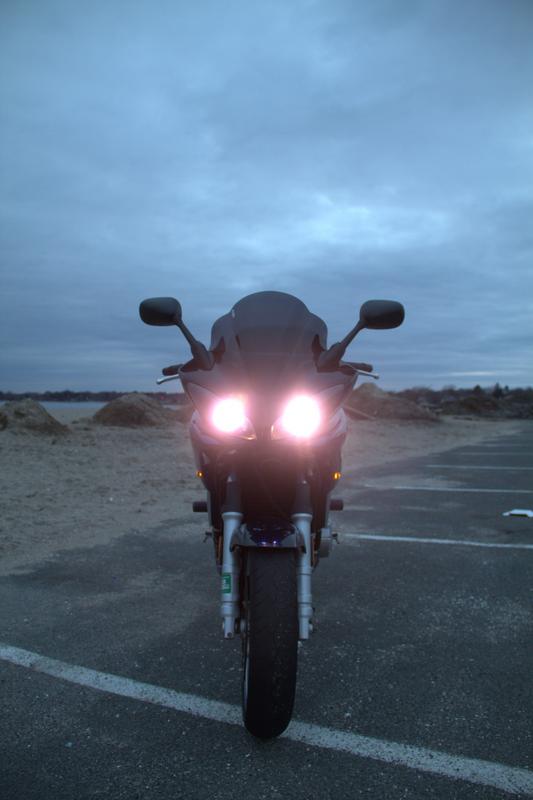
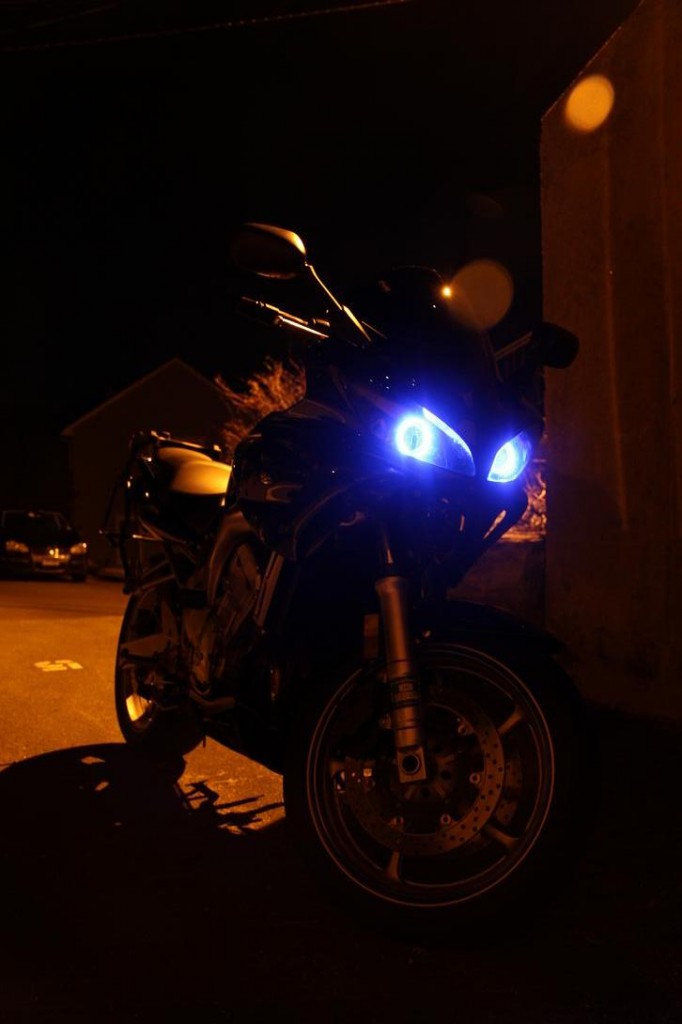
And so, off the the races. Here is the target (the one of the right, not the one on the left, though, HSK sells a heated seat kit for motorcycles, and I am curious about it):

Target: Subaru Impreza 2008

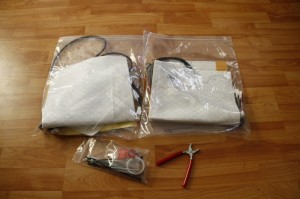
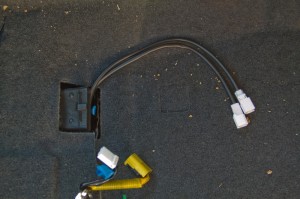
Here is what the kits look like:

Heated Seat Kits


Installation Manual(s)

One curious thing is that the kits do not contain installation manual. Instead, there is a sheet of paper that informs the recipient that manuals are not sent as a part of being more environmentally friendly, but PDF manuals can be found online. The link given leads to autowarm.com/manuals page that contains 3 different manuals. Alternatively, a manual can also be found under Installation tab on HSK’s site in both PDF and HTML format (“HTML format”, in this case being collection of 7 images – one for each page, NOT a searcheable page).

All of the manuals refer to separate “bottom” and “back” pads, difference being the bottom pad having 4-wire connector versus 2-wire connector in the back pad. According to the manual, the bottom pad contains temperature sensor. Both of the kits I received, however, contain identical pads – with only two wires coming out (the wiring harness also only contains 2-wire connectors for pads). The pads, however, clearly have some electronic element stitched in them, which could be temp sensors (afterall, all the element needs to do is turn off the power once the temperature of the pad reaches certain level, it can be done “locally”, on the given pad, vs sending signal back to the wiring harness and relay).

To make sure, however, I wanted to contact HSK tech support. Unfortunately, HSK does not have a technical support to call, and questions need to be submitted via online trouble ticket system. HSK took about 4 hours to reply and their reply was: “Yes, that is correct as the new models come with two 2-wire elements. They are interchangeable so the elements can go on any cushion. The instruction manuals are universal, therefore that does not apply to the new models.” Given that they maintain multiple different manuals online and don’t print them anyways, they could have done a slightly better job with manuals, but oh well.

Installation

Airbags

2008 Subaru Impreza comes with SRS sidebags installed on window side of each seat, and therefore, before removing seats (which will involve disconnecting the airbag wiring), it’s important to disconnect the battery (the installation manual mentions it as well) and wait for a few minutes, to avoid having to go to a dealership to fix “Airbag Warning” light. I’m no mechanic, but as I understand it, car’s computer(s) test airbag system and if they find one of the airbags not “online”, warning light is lit, and even if the bag is reconnected later, the system is considered compromised and needs the be checked.

Upholstery

After disconnecting the battery and removing the seat (which in Subie is attached to the body via 4 bolts), the next step is to open the upholstery for both bottom and back cushions. The manual suggests disassembling the seat to separate the back and the bottom, but I didn’t feel like having to deal with the springs and sliding mechanism (mind you, this Subie has manual adjustments, not electronic ones), so I simply started lifting the seat covers hoping to be able to insert the pads, once I get access to most area of each cushion.

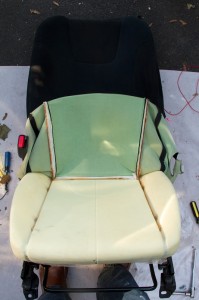
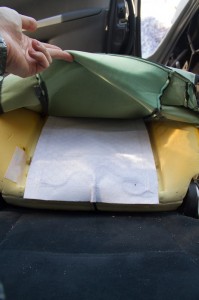
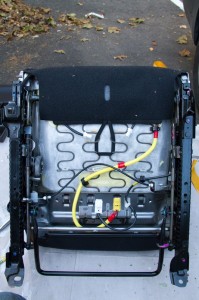
Here is the view of the bottom of the driver’s seat with covers lifted.

Seat Cover Removed

The stitching on the seats (which keeps the covers from sliding) is attached to the seat springs using small metal rings, known as hog rings, which need to be removed. I’ve never dealt with upholstery, and frankly, I found the process a real pain the butt, but eventually I figured out a way to do it using pliers (the installation kit included hog ring pliers, but I couldn’t figure out how to use them, nor was the tool’s handles were large enough to produce enough leverage). When putting the seats back together, I used zip-ties instead of hog rings, as metal hog rings would conduct electricity to the spring, which in best case would mess up the flow of electricity, and in worst case cause a short.

Fitting

The pads can be shortened (I ended up cutting the pads for the “backs” of the seats), but not cut in width – they are about 11 inches wide. If the pad’s placement happens to be under a stitch line holes may be made to place hog rings (or zip-ties) to connect the stitch line with the springs of the seat. One of the stitch lines on Subie’s seats is parallel to lateral axis, so one way or another, I’d have to have heating pad going through it, which means having to make at least two holes in the pad itself. Manual describes the process of making holes which is fairly easy to follow.

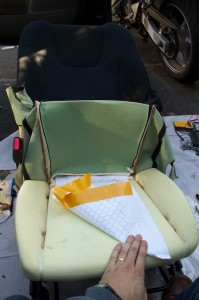
After cutting the holes and pulling the wire to the back of the seat, I placed the pad and started to pull off the paper that protects the sticky “sides” of the pad.

Bottom Pad Being Installed

With the pad placed on the seat cushion, it’s time to put everything back together. First things first – prepare the new “hog rings” – zip-ties:

New "Hog rings"


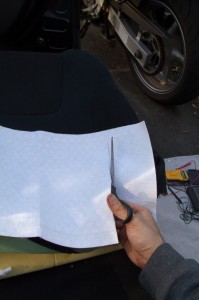
Before fully closing the bottom cushion, I switched to the back of the seat. The steps are the same: lift the cover, place the pad, close the cover. In my case, I had to shorten the pad in order to fit it in the seat. Here is marking the pad before cutting (you can see a faint line made by pencil on the pad).


Makrking The Back Pad

I chose not to fit the pad all the way to the top of the seat because that would require removing entire cover, which, in turn, would make me disassemble the seat. I figured most of the heat is felt in the lower back anyways. Here is the cutting


Cutting The Back Pad

And here is the placed pad before putting the cover back on.


Back Pad Placed

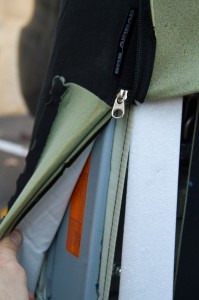
Here is the view of the SRS bag. Proceed carefully, try not to drop the seat onto that side 🙂


SRS Airbag

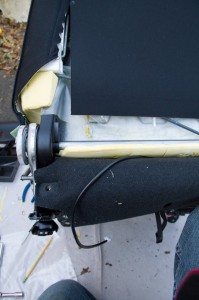
Here is the view of the wires run in the back. I ran wires from both pads to the side and under the bottom cushion’s flap.


Running The Wiring

Here is what the driver’s seat looks like at the end – you can see two black wires coming out from under the flap. The passenger’s seat is very similar, but it also has a sensor, so wiring is a little more convoluted.


Driver's Seat Bottom View

Wiring

The wiring harness is a relay unit which has one 2-wire power connector, one 3-wire switch connector, and two 2-wire pad connectors. pad connectors are by far the shortest ones (about 12 inches or so), and power and switch connectors approximately 40 inches. I initially thought of placing the harness itself on the seat itself, since the pad wires are the shortest ones,  and running the wires for power and switches from there. Unfortunately, the connectors on the power and switch cable are much on the opposite side of the wires from the relay unit, which would mean that they would end up somewhere underneath the central console, and if I ever had to remove the seats, I’d have to get in there in order to disconnect the wiring. Because of this, I placed the relay unit under the floor with pad wires being connected to the seat. Their length was just enough to support the full range of motion of the seat, and now to remove the seat I have to disconnect the pad wires. This takes care of the seat wiring, but still leaves out the power and control wires. While both of the wires are long, the connectors are located differently – control wire connector is about 6 inches from the switch itself while power connector is about half-way through the length, placing it under carpet on vertical side of transmission tunnel under central console. Maybe a small nitpicking, but I would prefer if the power connector was next to control connector which would make it accessible once the central console is lifted.


Harness Placement

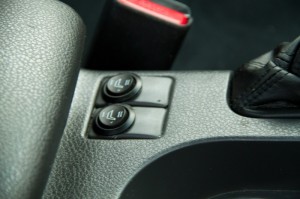
Subie comes with placeholders for the heated seats switches on the central console, which is where I decided to place the switches. Eventually, I’d like to get the stock switches, but for now I went with the ones provided with the kit. Luckily, armrest also contains cigarette lighter socket, which perfect for tapping into for power (it’s inside the armrest, so will most likely be used for charging an ipod or something similar, without much consumption).

2-stage Switches Installed

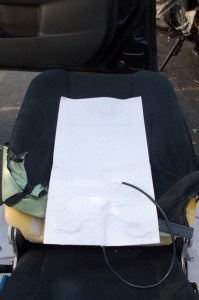
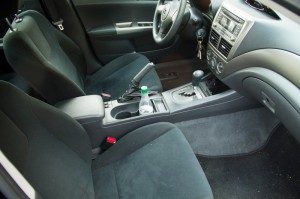
Here is the view of the final result:


Final Result

Tools

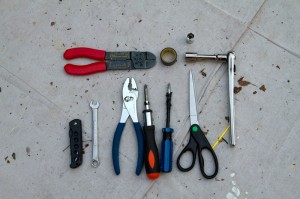
I ended up not using the installation kit provided apart from the wire tap-ins. Here are all the tools I used:

  • Wire cutters
  • Insulation Tape
  • Flat Screwdriver
  • Philips Screwdriver
  • Pliers
  • Knife
  • 12mm socket
  • 14mm socket
  • Scissors
  • Zip-ties
  • 10mm wrench (to disconnect the battery)


Tools Used

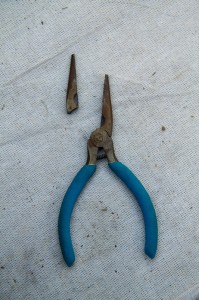
Lesson of the day: “Invest into good quality tools” – the old pliers that I had (got them from one of those cheapo toolkits) broke when I tried to use them to remove the hog rings.


"Invest Into Good Quality Tools"


Use

After putting everything back together, I tested the seats with… well, my own behind. The seats take some time to warm up, but the heat is definitely intense, I would think that it’s even more intense than “stock” heaters on my 2005 Saabaru. I got an impression that the second time the seats heated up more quickly than the first time I turned them on, but it may be an illusion – I will monitor more and will report the observations here.

Conclusion

Overall, I am happy with the kits – it looks like they are well made, the company shipped them quickly, answered my questions expeditiously (always wanted to use this work – ever since I’ve seen Oscar with Sly) and installing them was fairly easy. I would recommend this to people who are comfortable with small DIY projects and know how to work with automotive electronics.

Here is some nit-picking:

  • An order confirmation email when the order is placed is a must – come on, people, it’s 21st century
  • Manuals leave much to be desired – if you maintain them online, it’s not that difficult to update them – even if you have multiple models
  • “HTML format”??? really? it’s a collection of pictures! HTML should be searcheable
  • Connectors on power wiring could be closer to the end of wire (away from the relay unit) – this one is due to my placement, YMMV
  • “Installation kit” I found useless
 

Givi 3-Case Locks replacement

Last year, when I bought my “MiG”, one of the very first purchases I made was the Givi Monokey V46 topcase to address my storage needs for commuting. The case fits my helmet and jacket, but when touring I found myself wanting some additional room for my stuff. This is why in the beginning of this season I also purchased Givi N21 sidecases. I don’t carry them often, but when I do, I end up carrying two identical-looking keys for my luggage, which sometimes causes confusion.

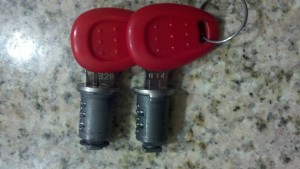
As it happens,  Givi sells a 3-case lock set with 6(!) Keys included. It’s only about $20, so I eventually pulled the trigger and got the keys shipped to me by Twisted Throttle.

The locks look almost identical to the ones installed in sidecases – the only exception is that the weather cover on the key hole is red in color as opposed to the usual chrome of the original locks. I had no problem replacing the locks: open the case, remove the retaining rig from the inside of the lock, replace the lock, and replace the retaining ring (the lock set comes with 3 retaining rings, in case if you lose the one you just removed)

The topcase turned out to be a little more difficult. The topcase lock is about 13.5 mm in diameter, while sidecase lock is about 12.4.

Luckily, a sidecases lock can still be used inside in topcase ( it wouldn’t work the other way), but it introduces some “play” and makes the lock feel less solid.

Additionally the base of the lock cylinder (near the key side) has a different pattern of protrusions ( they serve as stops for the cylinder when it rotates) which makes it so that the sidecase lock cannot be fully set in place which, in turn, translates in the cylinder not coming out enough on the other side of the lock assembly. This means that the face of the rotating latch had to have about 0.5 – 0.8 mm filed off before I could put the retaining ring back in its place.

Overall, I am glad I was able to fix the incompatibility of the new locks with the topcase, bit it would be nicer if the 3-case lock set came with compatible locks.

DIY Project Pipeline – Kitchen

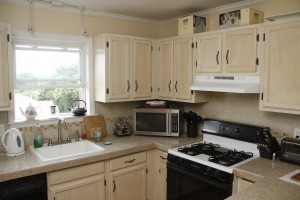
Finally, after a few months of working in the evenings and some weekends, and taking a long break to study for an exam, the kitchen is done.

Before:

After:

Modifications:
Rust-Oleum Cabinet Transformations Kit on kitchen cabinets
Granite Tile on the counter
Ceramic Tile on back-splash

Now, finally my first floor looks inhabitable and is not cluttered with tools

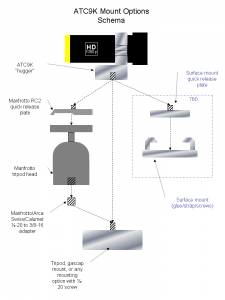
DIY Mounting Options for ATC9K

Here is my idea for framework of mounts for Oregon Scientific ATC9K camera. Since I found original mounts somewhat flimsy, I decided to come up with my own version of mounts. The scematic shows three possible way to mount the camera – directly to mount, via tripod head (for angle adjustments), and surface mount.

MiG Mods – Day 2

Day 2. Installing HID kit

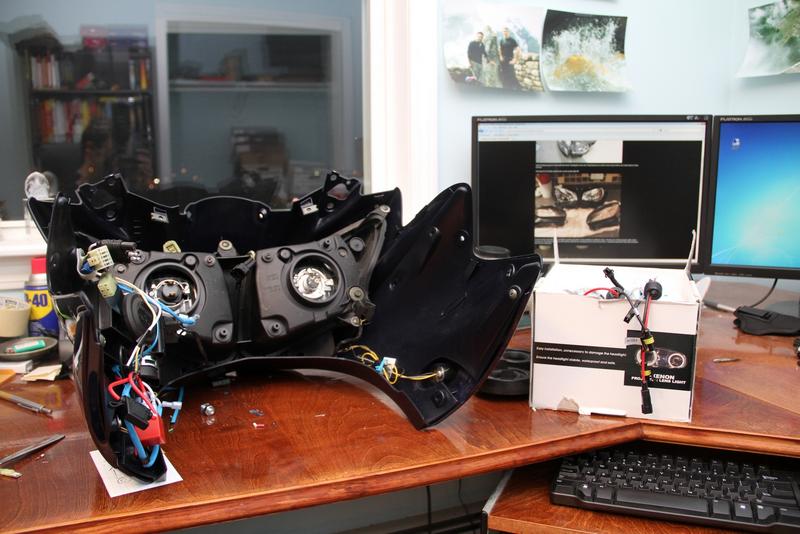
As I mentioned before, I ordered a 4300K Blue Angel Eye HID kit from seller hot-bid88 on ebay. The kit took exactly 10 days to arrive. Here is the kit:

Found the kit at my doorstep after going out with friends, still a little buzzed, so decided to go right at it. By the time i was done with wiring it was 2 am.
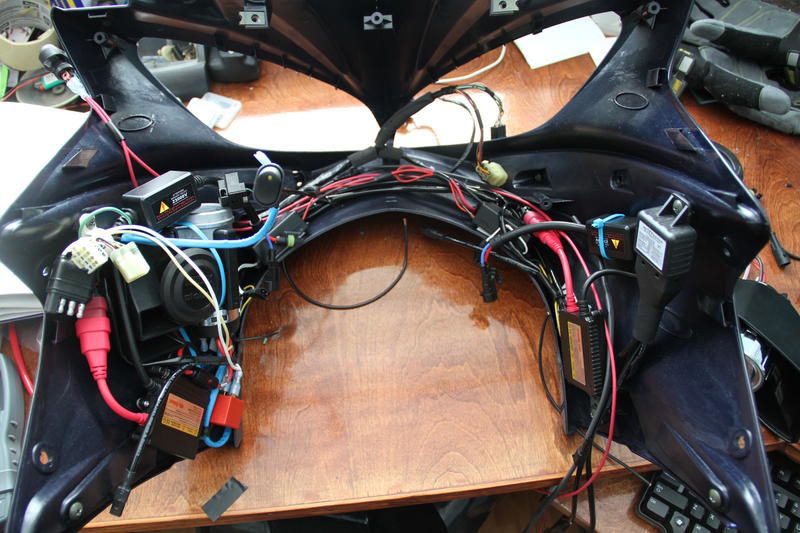
Here is the cowling at the beginning of my night. I’d already mounted Stebel Nautilus horn on the left side. As you can see from the picture, Boneman’s Mods site is the essential guide. Big thanks, Boneman – I’d never think these things were even possible.

Here is the end result:

This kit has only one controller which I mounted on the right side, with relays for angel eyes mounted on velcros right under the headlight assembly. There is only one connector and I had to test the lights to figure out which one was which.

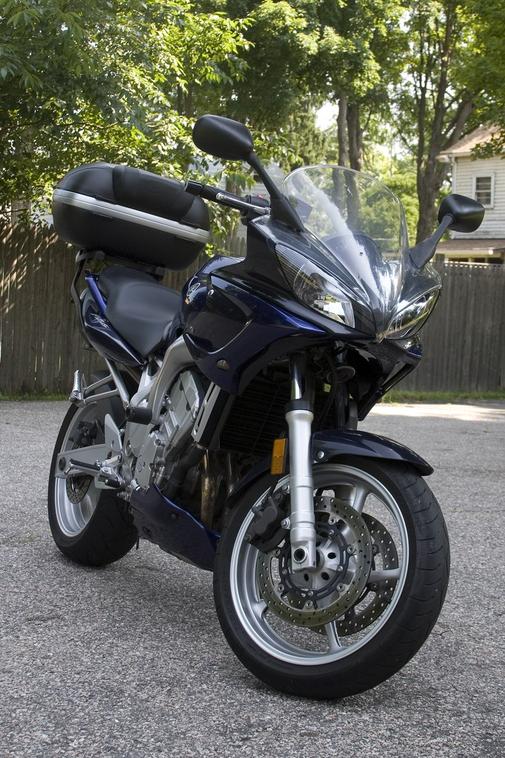
Fast forward few hours at my dad’s garage, and I got the cowling back onto the bike. Didn’t have much time left so didn’t take any pictures. Here are some from today though:

The original:

The NEW Look:

Now I just need to align the headlights and install the side panels in the cockpit. Almost done!!!!!

Ads

MiG Mods – Day 1

Day 1. Replacing the Cowling. Mounting Givi sidecase racks. Trying to Start

This is the goodies!!!!

Funny thing – I ended up with some “extras” in the box with the oem cowling I ordered – a whole bunch of gaskets, transmission parts (not from FZ-6, unfortunately) and some floor mats, that look like they belong to a scooter or, maybe, a waverunner.

Cowling
This is what the old cowling looked like:

While replacing it, I realized how badly bent the cowling bracket was at the point where the left mirror is mounted – i couldn’t even remove that mirror. I spent good 20 mins trying to shape it, and it will work for now, but i’m going to get a replacement.

Starting the Engine
I also tried to start the engine (I did not connect the battery to the tender when i put the bike into storage). Sure enough, the battery had only enough juice to display time. And my new YUASA charger wouldn’t recognize the battery. So what I did was take a regular 9V battery, made “jumper” wires and for a brief moment connected the 9V battery in parallel with the bike’s battery. My logic was that if the charger is “looking” for voltage, it should react to the spike caused by 9V battery. WARNING: Do NOT try to do this yourself after reading this post – I am known to try stupid things and take risks without really thinking what consequences could be – chances are, I just got lucky, because the charger switched into Charging mode.

Er-1 Code
After a few hours of charging, I tried to start the engine again, only to get the “Er-1” code. The fuel pump runs, the starter relay is ticking, and nothing. I brought ECU into house, and waited until the battery was charged, then replaced the ECU and voila, the bike started! Whether it was ECU or the battery, i am not sure.

Here is a short lapse-time video

MiG Mods Pipeline

Alllright, most of this white sh… s… stuff is gone, I’m almost ready to start the season.

I’m just as excited as i was last year when i rode my KLR in January.
After long, cold, sad winter that seemed like it would last forever, I’ve gone shopping for the new season. Yes, i got tax refund, as you can tell:

  • Replacement OEM Front Cowling – after my fall, i thought hard whether or not to expose myse… i mean… go naked, but decided to stay with cowling. One of the decisive factors was the fact that i can fit switches and buttons better on the cowling (and i’ll need some, given other mods).
  • Decals (my “MiG” decal is gone with the old cowling). flightlinefabrications guys are great as always… Not sure if by mistake or out of good will – i ordered 1 decal and they sent me 2. I’m also thinking to get a couple of custom decals in “russian fighter jet” theme.
  • Puig Windshield (dark smoke) – i’ll compare it to my new OEM shield, and the winner will stay.
  • Givi E21 sidecases – after deciding between E21s, V35s, and E41s, I decided to sacrifice capacity to have narrower rear.
  • Stebel Horn – from what i saw on twistedthrottle, that thing sounds like a EMD SD-40, all i need is add the bell. I’m thinking to have a “highway mode” switch
  • Shipped my stock seat to Spencers Motorcycle Seat Mods this morning. After failing to mentally prepare myself to pay for a TS seat, I learned here about Spencer. This forum rocks, nuff said!
  • Ordered HID kit with Angel Eye from hot-bid88. Wanted this mode ever since I bought the bike, so let’s see if i can make it work.

Something tells me i’ll spend considerable amount of time at my dad’s garage in the next few weeks. Can’t wait!!!!!

DIY projects pipeline

It looks like there are some significant changes coming to my life in the next few months, and to accommodate them, I need to do some remodeling in my house. In particular, I need to:

1) Resurface the kitchen cabinets – the current kitchen is fugly – dark wood which has accumulated some grease on the surfaces.

2) Remodel first floor bathroom – it’s a half-bathroom, and it (still) has popcorn ceiling and vanity cabinet that seems to be from the 70-ies.

3) Remodel second floor bathroom – full bathroom with sick looking blue-colored bathtub, toilet and sink. No comments needed.

Of course, my current financial situation does not allow me to simply hire contractors, so I will have to do all (or most of it) in a DIY fashion. Time to break out those tools!

Kitchen Cabinets are the first in line – I can start working on them immediately without significant expenditures on materials.

Blogspot to WordPress

In an act of clangorously ineffectual defiance I switched from using Google’s Blogspot to hosting my own blog using WordPress software. Now I feel cozily secure and delude myself of my self-importance. 🙂

The transition went relatively smooth, Interner Planners is a great hosting service with a very good control panel for the site which allows setting up popular applications very quickly. The only problem I have encountered was importing the old posts from the Blogger into the newly established, WordPress-powered epitome of inconsequentiality.

In particular:

WordPress suite has a set of plugins that allows user to import their blog from various formats and services, such as Blogger, Yahoo360, LiveJournal, and many others. Unfortunately, after installing “Import from Blogger” plug-in and running it, my excited self ran into this error message:

Could not connect to https://www.google.com

There was a problem opening a secure connection to Google. This is what went wrong:

Unable to find  the socket transport “ssl” – did you forget to enable it when you configured PHP?

Some googling lead me to this article. Which describes the problem and has one simple solution: export to XML and import into the WordPress. Unfortunately, there is a downside – the images will stay on the blogger, list formatting is off and couple other minor annoyances. This was not exactly what I was looking for, so I tried to come up with an alternative solution.

I decided to do it in a more complicated way (as always, your obedient servant seeks no easy paths!) After much thinking, reasoning that wordpress.com would probably have their ssl enabled, as well as porting from WordPress.com to wordpress should be easier, I created an account on wordpress.com and imported the content from blogger using the same plug-in. Then, I exported the XML file from the WordPress.com and imported it into the WordPress. The images were moved, lists preserved. Labels became Categories.

So, technically, my blog moved: Blogspot -> WordPress.com ->Wordpress.org Oh, and btw, the accounts in WordPress are permanent, you will not be able to delete them, so just be prepared to delete all the posts.

There were some additional adjustments I had to go through:

  • Fix tags and categories.
  • Fix Fotki.com (another great service, and they are not paying my for saying this, btw) widgets, which were not imported at all
  • Fix some of the pictures – they would show 100% zoom, which made them look too big. Technically speaking, I should probably upload smaller versions of them, but I am too lazy, so I simply scaled them down

The first impressions of the WordPress Suite are quite positive. There are definitely more gauges to look at and adjustments to make, but it looks quite impressive.