HeatedSeatKits.com Heated Seat Kit Review & Installation

With winter coming (way too) soon, I decided to add heated seats to my s/o’s car, and here is my experience. Overall, so far I am very satisfied with the product, despite few minor things that I would change.

Ordering

After a little bit of research online, I came up with HeatedSeatKits.com (HSK), also known as Autowarm.com as a potential source of the kits. The kits I got were Innovative Heat II kits which cost $90 and come with 2 heat settings and are advertised as their most popular and universal model. Each kit includes two pads – one for bottom cushion and one for back cushion – wiring harness and 3-position switch.

I placed order on their website on Monday morning, via fairly simple process. The $90 includes shipping, and in addition I bought a suggested $20 installation kit, for the total of $200. One thing that bothered me a little was the fact that when I placed the order, I did not receive a confirmation email that would contain any kind of order information. However, I did not get to wonder about that for too long because, to my surprise, I found my order at my doorstep on Tuesday! the order was shipped from WA to CT via USPS and got there in one day. That’s impressive, I have to say.

As it turns out, there is a page where you can find status of the order and even order reference # using full name OR a zip code (!), but I still believe these days email is a must.

And so, off the the races. Here is the target (the one of the right, not the one on the left, though, HSK sells a heated seat kit for motorcycles, and I am curious about it):

Target: Subaru Impreza 2008

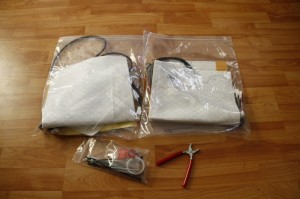
Here is what the kits look like:

Heated Seat Kits


Installation Manual(s)

One curious thing is that the kits do not contain installation manual. Instead, there is a sheet of paper that informs the recipient that manuals are not sent as a part of being more environmentally friendly, but PDF manuals can be found online. The link given leads to autowarm.com/manuals page that contains 3 different manuals. Alternatively, a manual can also be found under Installation tab on HSK’s site in both PDF and HTML format (“HTML format”, in this case being collection of 7 images – one for each page, NOT a searcheable page).

All of the manuals refer to separate “bottom” and “back” pads, difference being the bottom pad having 4-wire connector versus 2-wire connector in the back pad. According to the manual, the bottom pad contains temperature sensor. Both of the kits I received, however, contain identical pads – with only two wires coming out (the wiring harness also only contains 2-wire connectors for pads). The pads, however, clearly have some electronic element stitched in them, which could be temp sensors (afterall, all the element needs to do is turn off the power once the temperature of the pad reaches certain level, it can be done “locally”, on the given pad, vs sending signal back to the wiring harness and relay).

To make sure, however, I wanted to contact HSK tech support. Unfortunately, HSK does not have a technical support to call, and questions need to be submitted via online trouble ticket system. HSK took about 4 hours to reply and their reply was: “Yes, that is correct as the new models come with two 2-wire elements. They are interchangeable so the elements can go on any cushion. The instruction manuals are universal, therefore that does not apply to the new models.” Given that they maintain multiple different manuals online and don’t print them anyways, they could have done a slightly better job with manuals, but oh well.

Installation

Airbags

2008 Subaru Impreza comes with SRS sidebags installed on window side of each seat, and therefore, before removing seats (which will involve disconnecting the airbag wiring), it’s important to disconnect the battery (the installation manual mentions it as well) and wait for a few minutes, to avoid having to go to a dealership to fix “Airbag Warning” light. I’m no mechanic, but as I understand it, car’s computer(s) test airbag system and if they find one of the airbags not “online”, warning light is lit, and even if the bag is reconnected later, the system is considered compromised and needs the be checked.

Upholstery

After disconnecting the battery and removing the seat (which in Subie is attached to the body via 4 bolts), the next step is to open the upholstery for both bottom and back cushions. The manual suggests disassembling the seat to separate the back and the bottom, but I didn’t feel like having to deal with the springs and sliding mechanism (mind you, this Subie has manual adjustments, not electronic ones), so I simply started lifting the seat covers hoping to be able to insert the pads, once I get access to most area of each cushion.

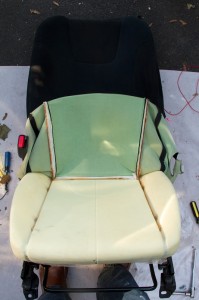
Here is the view of the bottom of the driver’s seat with covers lifted.

Seat Cover Removed

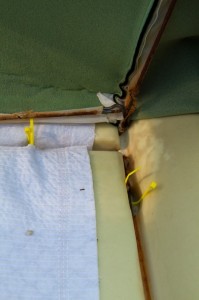
The stitching on the seats (which keeps the covers from sliding) is attached to the seat springs using small metal rings, known as hog rings, which need to be removed. I’ve never dealt with upholstery, and frankly, I found the process a real pain the butt, but eventually I figured out a way to do it using pliers (the installation kit included hog ring pliers, but I couldn’t figure out how to use them, nor was the tool’s handles were large enough to produce enough leverage). When putting the seats back together, I used zip-ties instead of hog rings, as metal hog rings would conduct electricity to the spring, which in best case would mess up the flow of electricity, and in worst case cause a short.

Fitting

The pads can be shortened (I ended up cutting the pads for the “backs” of the seats), but not cut in width – they are about 11 inches wide. If the pad’s placement happens to be under a stitch line holes may be made to place hog rings (or zip-ties) to connect the stitch line with the springs of the seat. One of the stitch lines on Subie’s seats is parallel to lateral axis, so one way or another, I’d have to have heating pad going through it, which means having to make at least two holes in the pad itself. Manual describes the process of making holes which is fairly easy to follow.

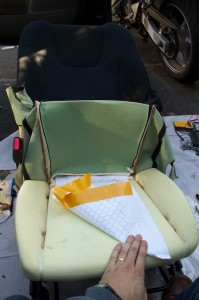
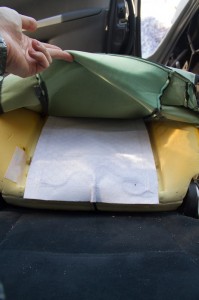
After cutting the holes and pulling the wire to the back of the seat, I placed the pad and started to pull off the paper that protects the sticky “sides” of the pad.

Bottom Pad Being Installed

With the pad placed on the seat cushion, it’s time to put everything back together. First things first – prepare the new “hog rings” – zip-ties:

New "Hog rings"


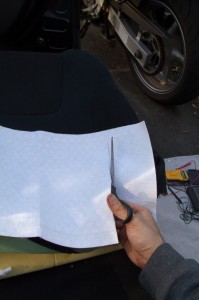
Before fully closing the bottom cushion, I switched to the back of the seat. The steps are the same: lift the cover, place the pad, close the cover. In my case, I had to shorten the pad in order to fit it in the seat. Here is marking the pad before cutting (you can see a faint line made by pencil on the pad).


Makrking The Back Pad

I chose not to fit the pad all the way to the top of the seat because that would require removing entire cover, which, in turn, would make me disassemble the seat. I figured most of the heat is felt in the lower back anyways. Here is the cutting


Cutting The Back Pad

And here is the placed pad before putting the cover back on.


Back Pad Placed

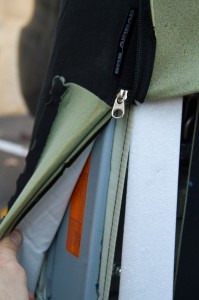
Here is the view of the SRS bag. Proceed carefully, try not to drop the seat onto that side 🙂


SRS Airbag

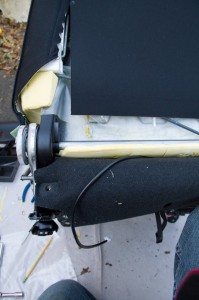
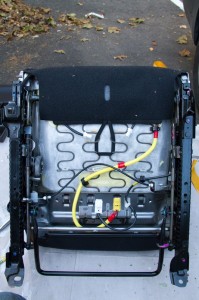
Here is the view of the wires run in the back. I ran wires from both pads to the side and under the bottom cushion’s flap.


Running The Wiring

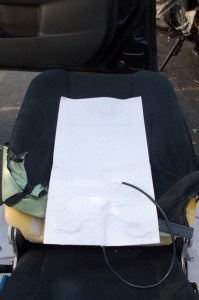
Here is what the driver’s seat looks like at the end – you can see two black wires coming out from under the flap. The passenger’s seat is very similar, but it also has a sensor, so wiring is a little more convoluted.


Driver's Seat Bottom View

Wiring

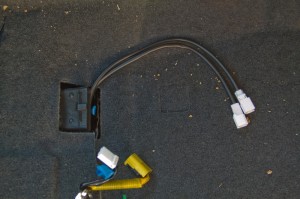
The wiring harness is a relay unit which has one 2-wire power connector, one 3-wire switch connector, and two 2-wire pad connectors. pad connectors are by far the shortest ones (about 12 inches or so), and power and switch connectors approximately 40 inches. I initially thought of placing the harness itself on the seat itself, since the pad wires are the shortest ones,  and running the wires for power and switches from there. Unfortunately, the connectors on the power and switch cable are much on the opposite side of the wires from the relay unit, which would mean that they would end up somewhere underneath the central console, and if I ever had to remove the seats, I’d have to get in there in order to disconnect the wiring. Because of this, I placed the relay unit under the floor with pad wires being connected to the seat. Their length was just enough to support the full range of motion of the seat, and now to remove the seat I have to disconnect the pad wires. This takes care of the seat wiring, but still leaves out the power and control wires. While both of the wires are long, the connectors are located differently – control wire connector is about 6 inches from the switch itself while power connector is about half-way through the length, placing it under carpet on vertical side of transmission tunnel under central console. Maybe a small nitpicking, but I would prefer if the power connector was next to control connector which would make it accessible once the central console is lifted.


Harness Placement

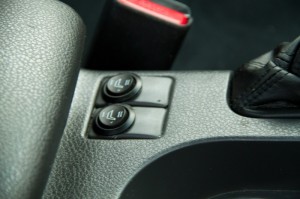
Subie comes with placeholders for the heated seats switches on the central console, which is where I decided to place the switches. Eventually, I’d like to get the stock switches, but for now I went with the ones provided with the kit. Luckily, armrest also contains cigarette lighter socket, which perfect for tapping into for power (it’s inside the armrest, so will most likely be used for charging an ipod or something similar, without much consumption).

2-stage Switches Installed

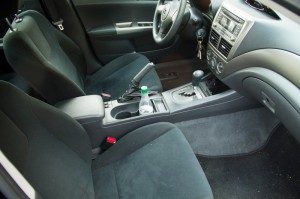
Here is the view of the final result:


Final Result

Tools

I ended up not using the installation kit provided apart from the wire tap-ins. Here are all the tools I used:

  • Wire cutters
  • Insulation Tape
  • Flat Screwdriver
  • Philips Screwdriver
  • Pliers
  • Knife
  • 12mm socket
  • 14mm socket
  • Scissors
  • Zip-ties
  • 10mm wrench (to disconnect the battery)


Tools Used

Lesson of the day: “Invest into good quality tools” – the old pliers that I had (got them from one of those cheapo toolkits) broke when I tried to use them to remove the hog rings.


"Invest Into Good Quality Tools"


Use

After putting everything back together, I tested the seats with… well, my own behind. The seats take some time to warm up, but the heat is definitely intense, I would think that it’s even more intense than “stock” heaters on my 2005 Saabaru. I got an impression that the second time the seats heated up more quickly than the first time I turned them on, but it may be an illusion – I will monitor more and will report the observations here.

Conclusion

Overall, I am happy with the kits – it looks like they are well made, the company shipped them quickly, answered my questions expeditiously (always wanted to use this work – ever since I’ve seen Oscar with Sly) and installing them was fairly easy. I would recommend this to people who are comfortable with small DIY projects and know how to work with automotive electronics.

Here is some nit-picking:

  • An order confirmation email when the order is placed is a must – come on, people, it’s 21st century
  • Manuals leave much to be desired – if you maintain them online, it’s not that difficult to update them – even if you have multiple models
  • “HTML format”??? really? it’s a collection of pictures! HTML should be searcheable
  • Connectors on power wiring could be closer to the end of wire (away from the relay unit) – this one is due to my placement, YMMV
  • “Installation kit” I found useless
 

ATC9K Review – Follow Up #2: Mount Options

It looks like Oregon Scientific realized where the weakness of their ATC9K camera is – the mount system. This morning I went to their site to look for a spare battery, and saw that they started selling two additional mounts!

UltraClamp Camera Mounting Kit

and

Fat Gecko Camera Mount with suction cups

Additionally, they’ve added an external battery charger and a standard mount kit which is available separately from the camera.

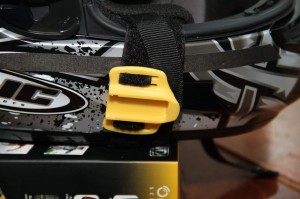
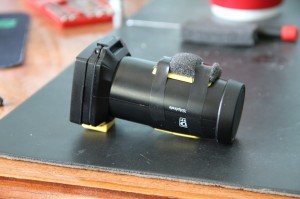
This is great news. As I wrote before, I believe that the mount options were the Achilles’ Heel of Oregon Scientific’s camera system. What I still would like to see is stronger connection between the Camera Clamp (the “hugger” that holds the cylindrical body of the camera) and Base Mount. They both are made of plastic, and I am just a little nervous about how well they will hold in more extreme conditions of Down Hill riding, or exposure to high airflow of motorcycle riding. If only the Camera Clamp was made of more substantial plastic and had a standard photo tripod screw thread!

What I also like about the setup is that the connection is the standard connection for photo equipment, which means that when you are buying the UltraClamp, it’s compatible not only with ATC9K, but also with other cameras, so you can use a point’n’shoot as well.

Additionally, it would be great if Oregon Scientific came up with sticky mounts like he GoPro’s which you could stick to places like car’s bumper or motorcycle’s swingarm for impressive video angles, leaving the mount there, and attaching camera to it when you want to make a video.

Original Review

Review Follow-Up #1

Book Recommendation: The Unthinkable by Amanda Ripley

“What? The end? Already?” – that was my reaction when I ran into page 232 of .“The Unthinkable: Who Survives When Disaster Strikes and Why” by Amanda Ripley I started reading it only two days ago, and could not stop – on the subway, on the train, and during breakfast.

Ms Ripley created a great book that explores human reaction to disasters and high-stress situations. She has done extensive research in the topic and provided a number of examples ranging from Halifax Explosion to 9/11 and Katrina to Holy Ground Stampede illustrating how we, as humans, behave and what we can do psychologically to stand a better chance if we find ourselves in a high-stress situation. She mentions that this is not a book on how to pack an emergency kit, but how to prepare yourself mentally. The book is very well written, read easily and provides vivid examples.

Some of the topics covered: Fear, Heroism, Stages one goes through in disaster. Post-9/11 security theater also got a few well-deserved jabs. One of important secondary points is how we (mis)evaluate risk and assign higher probabilities to events that in reality are not very likely to occur and what happens as a result. Another book on this topic that I highly recommend is “Beyond Fear” by Bruce Schneier

From Ms. Ripley’s blog, I found out that she is currently working on a book on another topic that interests me greatly – American educational system as compared to other countries. Ms. Ripley certainly has one buyer signed up now. 😉

Overall The Unthinkable is most definitely a highly recommended book!

“That I May Die Roaming” by Oisin Hughes

Great! Just great! Just when I thought I got the LWR fever down to a manageable level (though, I am looking forward to re-watching the series on my new plasma TV) and thought I won myself a year or two before I say “F*%@ it”, jump on the bike and take off searching for adventures on my sorry rear axle, somebody fz6 forum posts a link to “That I May Die Riding” by Oisin Hughes He writes about his 34,000-mile trip through Pan American Highway on a motorcycle. I started reading it and just cannot stop – I really like the guy and how he writes – lots of humor with some self-irony and great stories about his adventures.

ATC9K Review Follow-Up

Battery Life

Yesterday, after getting my Class 4 16Gb microSD card in the mail, I finally had a chance to test the battery life of the camera. My result is about 2 hours 50 minutes continuously shooting HD/30 video with GPS unit activated. During this time, my position was mostly stationary with clear view of the sky, so it’s possible that the battery would have been drained faster if GPS signal was interrupted from time to time. I periodically pressed the video button to bring the screen to life and see if it’s still recording (I’ve set the privacy mode to be my default – possibly another factor, though given how efficient LEDs are, I doubt it)

Memory Use

During the test, the camera wrote three video files – 2 files 3.8 Gb each and 1 file 2.7 Gb with the larger files being approximately 1 hour 04 minutes long  and the smaller file being approximately 40 minutes long.

Motorcycle Noise Issue

As I mentioned in the main review, I experienced an issue with a high-pitch noise appearing during the acceleration when mounted on the handlebar using the provided handlebar mount. Trying to alleviate the problem, I’ve replaced the rubber fitting that sits between the mount and the handlebar with special sorbothane, hoping that the vibrations would be absorbed. Unfortunately, the sorbothane fitting did not help – it “delays” the appearance of the noise, but does not eliminate it – so, the quest for mounting camera on the motorcycle continues.


Ads

ATC9K “All-terrain” Camera Review

Summary:

Good camera, overall, many interesting features, that I hope will become more standard on other “action” cameras: snapshot ability, waterproof w/o any case, remote control, G-force sensor, and optional GPS unit. Not so good mounts (though, at least some of them), especially NOT motorsports-optimized, below average PC software UI. Above average video quality. Good controls. You will need to come up with some mounts yourself, but once you do, the camera performs great.

Intro:

This past summer I played around with GoPro HD camera, and I liked it overall, but did not care for the controls, and having to switch backs back and forth. Controls of the camera are plain horrid! Do you really want me, the popcorn-chewing consumer, to have to memorize what those numbers mean? Anyways, back to store the camera went, and I thought to myself, “the ‘action’ cameras are still somewhat ‘raw'”. Fast forward 6 months, and I’m revisiting the camera question – I’d like to take some videos and pictures while riding, and I don’t want to mount Canon 7D onto the bike. After much research and thinking whether I should bite the bullet and go back to GoPro, I decided to give Oregon Scientific ATC9K camera a try. I got it from REI.com (20% off coupon and some dividends helped 😉 ) with the optional GPS module and after few days of waiting, here it is, in my hands.

Packaging and Contents:

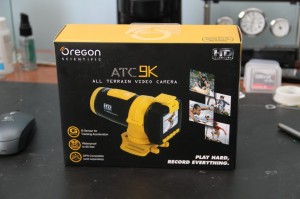
The packaging looks impressive and promises video/photo paradise on earth.  I like the black/yellow color scheme – very Monster Yamaha 🙂

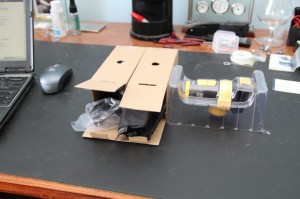
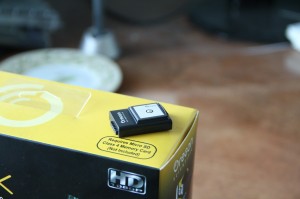
The package includes: camera itself, li-polymer battery, remote control, synthetic camera carry bag, helmet mount, handlebar mount, velcro and silicon straps, usb cable, front and rear protective caps, and hdmi cable. The required microSD Class 4 memory card is not included.

External Features and Controls:

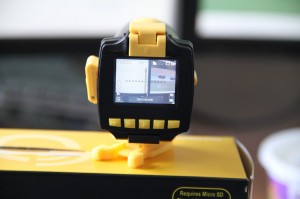
The controls are fairly simple and intuitive (watch and learn, GoPro!) there are two large buttons on top of the cylindrical body – one for taking a snapshot, and another one to start/stop the video recording. You cannot take a snapshot while making the video. The rear of the camera has 1.5 inch LCD screen (refer to the earlier comment, GoPro, no need to pay extra to get a “backpack” to be able to play the video) which I found sufficiently bright to view video on a sunny day. The screen contains all the needed information: shooting mode, exposure compensation, quality, photo quality, white balance, battery status and timer. There is also an optional leveling aid with longitudinal (roll) and lateral (pitch) indicators.

There are 5 control buttons under the screen: Menu, Previous, Play/Pause/Ok, Next, Power. These buttons are just the right size – I can even work them wearing summer motorcycle gloves – and they require some force to be pushed, so accidental activation is not likely.

One of the reasons why I got the camera is the remote control. It’s a nicely sized remote with buttons matching control buttons on the camera, minus the power button. The remote is NOT waterproof – something that I think Oregon Scientific could address – why not keep the “all-terrain” style in all working parts? Meanwhile, I’ll have to improvise:

The remote seems to work at distances up to 10 ft., with one IR receiver only in the front of the camera.

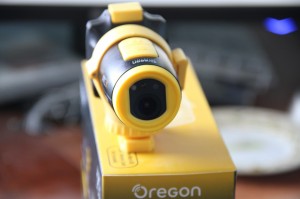
Speaking of the front of the camera, here is the frontal view – the lens is set inside the plastic rim, so the camera can be put onto its front without damaging the lens. Right next to the lens, we have an LED indicator, laser pointer and IR receiver. The LED indicator shows charging status and recording status. The laser can be set to work for 5 or 10 seconds before the start of the video to align the shot.

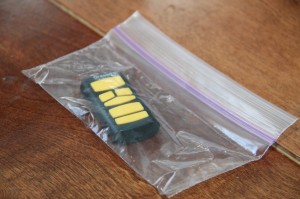
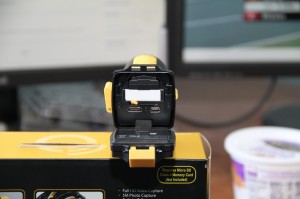
Inside the waterproof door, we have the GPS module, the battery the microSD slot and HDMI and mini USB connectors (just when I hoped I could switch all my sync needs to microUSB, but Canon 7D uses mini as well, so I suppose i shouldn’t complain). The camera is waterproof to 60 ft./20 meters – not as diver-friendly as GoPro in its shell (down to 180 ft/60 meters), but the way I look at it, when you are at those depths, you have other things to worry about, such as pressure and light.

The only remaining external feature of the camera is the microphone which is located on the opposite side from the two main control buttons.

How It Works:

The camera powers up after the power button is pressed for more than 2 seconds and takes just about 2 seconds to power up. Luckily all the music can be disabled. Camera also has Privacy mode, where the camera will not make any sounds and will not indicate the recording status via the LED indicator.There are plenty of adjustments and modes to play with – on par with regular point’n’shoot cameras, which is pleasantly surprising, yet mostly useless, in my opinion.

GPS (optional):

One cool feature of the camera is the GPS module that is optionally available for the ATC9K camera. I am loving it – now I can record where I was without much thinking. The GPS module creates a .MAP file which is later read by Oregon Scientific software and plotted on Google Maps.

G-Sensor:

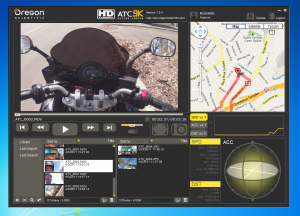
Another cool feature is the G-sensor which records the acceleration and velocity into the same .MAP file. The software that comes with the camera will display the information in parallel to the video as well as some statistics and charts, Acceleration plotted against time, for example.

Video:

The camera has 130 degree angle of view. Not as wide as GoPro’s 170 degrees, but good nevertheless.

There are few video modes available:

  • FullHD/30 – 1920×1080, 30 fps – approx. 9 minutes of video per 1Gb (source: manual)
  • HD/60 – 1280×720, 60 fps – approx. 10 minutes of video per 1Gb
  • HD/30 – 1280×720, 30 fps – approx 15 minutes of video per 1 Gb
  • WVGA – 848×480, 60 fps – approx 15 minutes of video per 1 Gb

These settings can be permuted with Fine, Good and Normal quality levels.

Adjustments can be made to Exposure, White Balance, Contrast and Sharpness.

Duration can also be set to 15, 30 seconds, 1, 2, 5, 10 minutes to stop the recording.

Pictures:

Picture quality can be adjusted:

Resolution: 3 or 5 Megapixel

Quality: Fine, Good, Normal

Adjustments match those for the video mode, and there is a night mode available, which boosts exposure.

There are some neat features for taking pictures periodically: you can set 3 or 5 continuous shots with interval of 10, 20, 30 seconds and  1, 2, 5, and 10 minutes. There is also a timer for 5 or 3 seconds.

Sound:

The microphone sensitivity can be adjusted between Maximum and Medium. No inputs for external microphones on this camera, but i’m guessing that’s the price of having a waterproof camera. Overall, the sound is good, however there is one problem I have noticed – when mounted on the handlebar of my Yamaha FZ6 using the included handlebar mount, there is an extremely loud high-pitch noise that appears during acceleration above 8-10 mph (warning: loud noise):

Originally, I suspected wind noise (some sort of a turbulence, given the location of the the mount vs location of the microphone, but I noticed an interesting thing – the noise goes away during the deceleration , even if the speeds are significantly higher than 8-10 mph threshold. I decided to see if the sound would be there if I mounted the camera elsewhere:

There is still strong wind noise, but the high-frequency sound is gone. Also, you can see how shaky the mount is.

After mounting the camera on my helmet, and NOT hearing the same noise, I can only conclude that the noise comes from the frame/mount combination. I sent a letter to Oregon Scientific Customer Service to see what they have to say. I am going to have to look into dampened camera mounts, I guess. Additionally, you can see that the narrow view angle does not work well with the handlebar mount.

As far as wind noise, I think it can be fixed with something along these lines:

Software:

The software that comes with the camera causes mixed feelings. On one hand it’s an interesting piece combining the video window with Google Maps, and acceleration,speed, distance charts and averages. Really good idea, but poorly implemented from the UI standpoint. The main window cannot be resized, nor can the components be adjusted. What if i don’t want to see my library all the time, but want to see a bigger video instead? I’m out of luck. Also, try to find the button that downloads the content form the camera! It took me few minutes of clicking and listening to “Exclamation” sound (see below). Response is somewhat slow, and highlighting of the buttons (available vs unavailable) is inconsistent. Every time you press a mouse button, Exclamation sound plays. Cute, but becomes annoying after about 1 minute, especially if you are trying to re-play something, or clicking around trying to find the needed function. Not very well thought through interface, Oregon Scientific, AND it doesn’t run on systems other than Windows. Another feature I don’t get is the “login” feature – why should I log in, even though, as far as i can tell the videos and pictures are readily available in the Documents folder.


The biggest flaw:

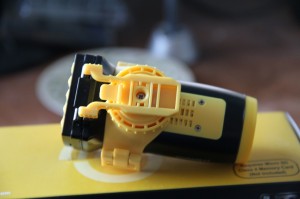
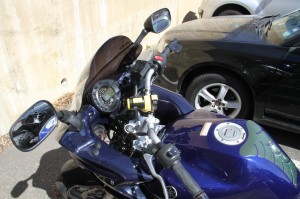
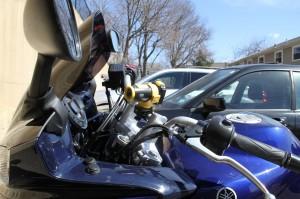
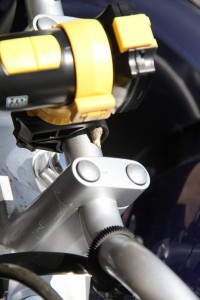
The mounts. I guess I got spoiled by GoPro “mount to anything” collection of mounting options. This camera is ok for a bicycle, perhaps, but the mounts are VERY flimsy.Here is how I mounted the camera onto the handlebar – this is the mount that caused the high-pitch noise.

(note the latest nano-technology modification to ensure that camera stays still)

I wouldn’t take this camera/mount combination to a DH worrying the plastic would just snap. I remember mounting GoPro on the swingarm of my bike, for interesting video angle, and I will need to work out some sort of my own mount to do that with ATC9K.

Now, given the issue with the sound, I will have to look into dampened mounts, which will cost extra $$$. And I’m certainly NOT entrusting this piece of electronics to this little piece of plastic to hold my camera on my motorcycle:

Conclusion:

In my dilettante opinion, this is a good camera for recording action, with some very useful features, such as waterproofing, remote control, integrated LCD, G-force recording, optional GPS unit. The video quality may not be the best, but it is at least very good compared to others. The sound is decent. The weak spot of this camera is the mounts that come with it – not enough of them and the ones that are there are not strong enough for hardcore applications. This camera would be great helmet camera for motorsports, DH biking, sky-diving, but the mounts are not up to par. Software gets another negative comment – it is something that looks like a good idea, but has confusing and not intuitive interface. Overall, I am keeping this camera, but will have to invest money and time into making my own mounts.

UPD1: Follow-Up #1

UPD2: Follow-Up #2

Newegg.com Customer Service

Today I had another opportunity how great the guys at www.newegg.com are.

In search for a better storage solution for my home, I decided to purchase a NAS appliance (QNAP TS-210) with 2 x 2Tb Western Digital Caviar Green WD20EARS SATA drives. True to my luck, after placing an order, and going to QNAP site, I find out that those particular models of WD drives are not recommended for use with TS-210 appliance. I call newegg, but as I am waiting for customer representative (maybe a minute or so), my order enters the warehouse which means it cannot be changed. Oh well, I’ll return them – i’ll have to pay for shipping, but it’s not the end of the world – afterall, I should have checked the model compatibility myself. In the meantime, I place another order with the drives that are recommended.

Yesterday, I received the first package ($0 shipping and it arrived the next day!!), and this morning I requested an RMA online. One thing that I did not like was the $30 restocking fee, so I called the customer service explaining the situation and asking to waive the restocking fee. After asking me if the drives were still sealed, not only did they waive the restocking fee, they even sent me a pre-paid UPS shipping label, so now I really don’t have to spend money.

I just wish more retailers were as good as these guys. Every time I order from them, the stuff gets to me faster than I expect, and if there are problems, they go out of their way to help. Good Job, Newegg!