It looks like Oregon Scientific realized where the weakness of their ATC9K camera is – the mount system. This morning I went to their site to look for a spare battery, and saw that they started selling two additional mounts!
Additionally, they’ve added an external battery charger and a standard mount kit which is available separately from the camera.
This is great news. As I wrote before, I believe that the mount options were the Achilles’ Heel of Oregon Scientific’s camera system. What I still would like to see is stronger connection between the Camera Clamp (the “hugger” that holds the cylindrical body of the camera) and Base Mount. They both are made of plastic, and I am just a little nervous about how well they will hold in more extreme conditions of Down Hill riding, or exposure to high airflow of motorcycle riding. If only the Camera Clamp was made of more substantial plastic and had a standard photo tripod screw thread!
What I also like about the setup is that the connection is the standard connection for photo equipment, which means that when you are buying the UltraClamp, it’s compatible not only with ATC9K, but also with other cameras, so you can use a point’n’shoot as well.
Additionally, it would be great if Oregon Scientific came up with sticky mounts like he GoPro’s which you could stick to places like car’s bumper or motorcycle’s swingarm for impressive video angles, leaving the mount there, and attaching camera to it when you want to make a video.
Here is my idea for framework of mounts for Oregon Scientific ATC9K camera. Since I found original mounts somewhat flimsy, I decided to come up with my own version of mounts. The scematic shows three possible way to mount the camera – directly to mount, via tripod head (for angle adjustments), and surface mount.
Yesterday, after getting my Class 4 16Gb microSD card in the mail, I finally had a chance to test the battery life of the camera. My result is about 2 hours 50 minutes continuously shooting HD/30 video with GPS unit activated. During this time, my position was mostly stationary with clear view of the sky, so it’s possible that the battery would have been drained faster if GPS signal was interrupted from time to time. I periodically pressed the video button to bring the screen to life and see if it’s still recording (I’ve set the privacy mode to be my default – possibly another factor, though given how efficient LEDs are, I doubt it)
Memory Use
During the test, the camera wrote three video files – 2 files 3.8 Gb each and 1 file 2.7 Gb with the larger files being approximately 1 hour 04 minutes long and the smaller file being approximately 40 minutes long.
Motorcycle Noise Issue
As I mentioned in the main review, I experienced an issue with a high-pitch noise appearing during the acceleration when mounted on the handlebar using the provided handlebar mount. Trying to alleviate the problem, I’ve replaced the rubber fitting that sits between the mount and the handlebar with special sorbothane, hoping that the vibrations would be absorbed. Unfortunately, the sorbothane fitting did not help – it “delays” the appearance of the noise, but does not eliminate it – so, the quest for mounting camera on the motorcycle continues.
Good camera, overall, many interesting features, that I hope will become more standard on other “action” cameras: snapshot ability, waterproof w/o any case, remote control, G-force sensor, and optional GPS unit. Not so good mounts (though, at least some of them), especially NOT motorsports-optimized, below average PC software UI. Above average video quality. Good controls. You will need to come up with some mounts yourself, but once you do, the camera performs great.
Intro:
This past summer I played around with GoPro HD camera, and I liked it overall, but did not care for the controls, and having to switch backs back and forth. Controls of the camera are plain horrid! Do you really want me, the popcorn-chewing consumer, to have to memorize what those numbers mean? Anyways, back to store the camera went, and I thought to myself, “the ‘action’ cameras are still somewhat ‘raw'”. Fast forward 6 months, and I’m revisiting the camera question – I’d like to take some videos and pictures while riding, and I don’t want to mount Canon 7D onto the bike. After much research and thinking whether I should bite the bullet and go back to GoPro, I decided to give Oregon Scientific ATC9K camera a try. I got it from REI.com (20% off coupon and some dividends helped 😉 ) with the optional GPS module and after few days of waiting, here it is, in my hands.
Packaging and Contents:
The packaging looks impressive and promises video/photo paradise on earth. I like the black/yellow color scheme – very Monster Yamaha 🙂
The package includes: camera itself, li-polymer battery, remote control, synthetic camera carry bag, helmet mount, handlebar mount, velcro and silicon straps, usb cable, front and rear protective caps, and hdmi cable. The required microSD Class 4 memory card is not included.
External Features and Controls:
The controls are fairly simple and intuitive (watch and learn, GoPro!) there are two large buttons on top of the cylindrical body – one for taking a snapshot, and another one to start/stop the video recording. You cannot take a snapshot while making the video. The rear of the camera has 1.5 inch LCD screen (refer to the earlier comment, GoPro, no need to pay extra to get a “backpack” to be able to play the video) which I found sufficiently bright to view video on a sunny day. The screen contains all the needed information: shooting mode, exposure compensation, quality, photo quality, white balance, battery status and timer. There is also an optional leveling aid with longitudinal (roll) and lateral (pitch) indicators.
There are 5 control buttons under the screen: Menu, Previous, Play/Pause/Ok, Next, Power. These buttons are just the right size – I can even work them wearing summer motorcycle gloves – and they require some force to be pushed, so accidental activation is not likely.
One of the reasons why I got the camera is the remote control. It’s a nicely sized remote with buttons matching control buttons on the camera, minus the power button. The remote is NOT waterproof – something that I think Oregon Scientific could address – why not keep the “all-terrain” style in all working parts? Meanwhile, I’ll have to improvise:
The remote seems to work at distances up to 10 ft., with one IR receiver only in the front of the camera.
Speaking of the front of the camera, here is the frontal view – the lens is set inside the plastic rim, so the camera can be put onto its front without damaging the lens. Right next to the lens, we have an LED indicator, laser pointer and IR receiver. The LED indicator shows charging status and recording status. The laser can be set to work for 5 or 10 seconds before the start of the video to align the shot.
Inside the waterproof door, we have the GPS module, the battery the microSD slot and HDMI and mini USB connectors (just when I hoped I could switch all my sync needs to microUSB, but Canon 7D uses mini as well, so I suppose i shouldn’t complain). The camera is waterproof to 60 ft./20 meters – not as diver-friendly as GoPro in its shell (down to 180 ft/60 meters), but the way I look at it, when you are at those depths, you have other things to worry about, such as pressure and light.
The only remaining external feature of the camera is the microphone which is located on the opposite side from the two main control buttons.
How It Works:
The camera powers up after the power button is pressed for more than 2 seconds and takes just about 2 seconds to power up. Luckily all the music can be disabled. Camera also has Privacy mode, where the camera will not make any sounds and will not indicate the recording status via the LED indicator.There are plenty of adjustments and modes to play with – on par with regular point’n’shoot cameras, which is pleasantly surprising, yet mostly useless, in my opinion.
GPS (optional):
One cool feature of the camera is the GPS module that is optionally available for the ATC9K camera. I am loving it – now I can record where I was without much thinking. The GPS module creates a .MAP file which is later read by Oregon Scientific software and plotted on Google Maps.
G-Sensor:
Another cool feature is the G-sensor which records the acceleration and velocity into the same .MAP file. The software that comes with the camera will display the information in parallel to the video as well as some statistics and charts, Acceleration plotted against time, for example.
Video:
The camera has 130 degree angle of view. Not as wide as GoPro’s 170 degrees, but good nevertheless.
There are few video modes available:
FullHD/30 – 1920×1080, 30 fps – approx. 9 minutes of video per 1Gb (source: manual)
HD/60 – 1280×720, 60 fps – approx. 10 minutes of video per 1Gb
HD/30 – 1280×720, 30 fps – approx 15 minutes of video per 1 Gb
WVGA – 848×480, 60 fps – approx 15 minutes of video per 1 Gb
These settings can be permuted with Fine, Good and Normal quality levels.
Adjustments can be made to Exposure, White Balance, Contrast and Sharpness.
Duration can also be set to 15, 30 seconds, 1, 2, 5, 10 minutes to stop the recording.
Pictures:
Picture quality can be adjusted:
Resolution: 3 or 5 Megapixel
Quality: Fine, Good, Normal
Adjustments match those for the video mode, and there is a night mode available, which boosts exposure.
There are some neat features for taking pictures periodically: you can set 3 or 5 continuous shots with interval of 10, 20, 30 seconds and 1, 2, 5, and 10 minutes. There is also a timer for 5 or 3 seconds.
Sound:
The microphone sensitivity can be adjusted between Maximum and Medium. No inputs for external microphones on this camera, but i’m guessing that’s the price of having a waterproof camera. Overall, the sound is good, however there is one problem I have noticed – when mounted on the handlebar of my Yamaha FZ6 using the included handlebar mount, there is an extremely loud high-pitch noise that appears during acceleration above 8-10 mph (warning: loud noise):
Originally, I suspected wind noise (some sort of a turbulence, given the location of the the mount vs location of the microphone, but I noticed an interesting thing – the noise goes away during the deceleration , even if the speeds are significantly higher than 8-10 mph threshold. I decided to see if the sound would be there if I mounted the camera elsewhere:
There is still strong wind noise, but the high-frequency sound is gone. Also, you can see how shaky the mount is.
After mounting the camera on my helmet, and NOT hearing the same noise, I can only conclude that the noise comes from the frame/mount combination. I sent a letter to Oregon Scientific Customer Service to see what they have to say. I am going to have to look into dampened camera mounts, I guess. Additionally, you can see that the narrow view angle does not work well with the handlebar mount.
As far as wind noise, I think it can be fixed with something along these lines:
Software:
The software that comes with the camera causes mixed feelings. On one hand it’s an interesting piece combining the video window with Google Maps, and acceleration,speed, distance charts and averages. Really good idea, but poorly implemented from the UI standpoint. The main window cannot be resized, nor can the components be adjusted. What if i don’t want to see my library all the time, but want to see a bigger video instead? I’m out of luck. Also, try to find the button that downloads the content form the camera! It took me few minutes of clicking and listening to “Exclamation” sound (see below). Response is somewhat slow, and highlighting of the buttons (available vs unavailable) is inconsistent. Every time you press a mouse button, Exclamation sound plays. Cute, but becomes annoying after about 1 minute, especially if you are trying to re-play something, or clicking around trying to find the needed function. Not very well thought through interface, Oregon Scientific, AND it doesn’t run on systems other than Windows. Another feature I don’t get is the “login” feature – why should I log in, even though, as far as i can tell the videos and pictures are readily available in the Documents folder.
The biggest flaw:
The mounts. I guess I got spoiled by GoPro “mount to anything” collection of mounting options. This camera is ok for a bicycle, perhaps, but the mounts are VERY flimsy.Here is how I mounted the camera onto the handlebar – this is the mount that caused the high-pitch noise.
(note the latest nano-technology modification to ensure that camera stays still)
I wouldn’t take this camera/mount combination to a DH worrying the plastic would just snap. I remember mounting GoPro on the swingarm of my bike, for interesting video angle, and I will need to work out some sort of my own mount to do that with ATC9K.
Now, given the issue with the sound, I will have to look into dampened mounts, which will cost extra $$$. And I’m certainly NOT entrusting this piece of electronics to this little piece of plastic to hold my camera on my motorcycle:
Conclusion:
In my dilettante opinion, this is a good camera for recording action, with some very useful features, such as waterproofing, remote control, integrated LCD, G-force recording, optional GPS unit. The video quality may not be the best, but it is at least very good compared to others. The sound is decent. The weak spot of this camera is the mounts that come with it – not enough of them and the ones that are there are not strong enough for hardcore applications. This camera would be great helmet camera for motorsports, DH biking, sky-diving, but the mounts are not up to par. Software gets another negative comment – it is something that looks like a good idea, but has confusing and not intuitive interface. Overall, I am keeping this camera, but will have to invest money and time into making my own mounts.
I am sitting here smiling like an absolute idiot and just need to share the excitement with somebody. I recently was looking for some inspiration in photography and bumped into Matt Richardson’s video on how to make a sound-activated flash trigger for high-speed photography (such as pictures of a bullet going through something, or a glass being shattered) based on Arduino chip.
I realize for some, this may not be a reason for much excitement and Arduino chips are nothing new to them, but keep in mind, I’m no engineer, I barely understand electronics, but i do like little DIY projects.
Because the trigger is Arduino-based I can just write code to perform tasks (turning off lights then arming the trigger then waiting for the sound, triggering the flash, closing the shutter and turning the lights back on)
I’ve never heard of Arduino before, and yesterday after getting it in the mail, I started reading up on it, was playing around, and that thing is amazing – I just can’t believe how easy it is for somebody who doesn’t know the inner workings of IC to make that chip perform tasks according to program. I have not assembled the trigger yet, but I did figure out how the Arduino needs to be connected to the rest of the parts by looking at the code and i got all the parts working – Now it’s just a matter of putting it all together.
Now I have whole winter to figure out what kind of Arduino-based mod to make for my bike. Last winter, it was my own LED brake light repeater/blinker, this time, i’m getting into programmable stuff!
Naming of the lenses is as follows: “Canon EF 70-200mm f2.8L IS”
Which translates into: EF (mount) 70-200mm (zoom) f/2.8(apperture)L (series) IS (image stabilization)
Mount. Canon has two types of semi-compatible mounts EF and EF-S:
EF mount is compatible with 35mm (aka full-frame) chips and film cameras. All of Canon cameras can be paired up with this lense.
EF-S mount is a digital-only mount, and EF-S lenses can be only mounted on Rebels and 30D-like cameras, but not the film cameras or top of the line full-frame cameras. This has to do with the fact that digital chips (due to the their cost of production) are smaller than 35 mm film frames, this is why on a film camera, human eye equivalent is 75-80mm focal length, while on digitals, it’s 50mm. If one were to actually mount an EF-S lense on 35mm equivalent camera and take a picture, the picture would be cropped from all sides. Here is a link to explanation of the chip size. Here is a good write-up by a real pro. The top of the line 1D and 5D cameras cannot use EF-S lenses because their chips are bigger.
Zoom. Zoom numbers tell you what range it covers. For a typical DSLR (with a APS-C sized chip):
< 40mm – wide angle and super wide angle – the picture include “more” than your eye sees from the same position. The objects will appear smaller.
40 – 70mm – “normal” lens – roughly equals to the focal range of human eye, you’ll see subjects 1:1
> 70mm – tele lens. the resulting image will be “zoomed in” with details standing out
To estimate the equivalent of the classification above for the full-frame, multiply the numbers by factor of 1.6. For larger medium (medium format cameras, for example). Here is more info.
If there is only one number, the lens you are looking at is a prime lens. More about them below.
IS – Image Stabilization system (Nikon’s equivalent is VR). IS is a special gyroscope system that attempts to compensate for small movement of the camera when shooting in low conditions, this allows taking sharper images. Here is more information.
LSeries – L is the designation for pro-level lenses from Canon. These lenses have the the best optics there is, pass the most light (so you can shoot in darker conditions), and are weather/dust proof. Generally they cost a lot and can be identified by their white color (great marketing trick – look at any sport events- all you see is white lenses on the sides, where photographers are), and a red line on the barrel. Really high quality lenses, but probably not worth starting with. Careful while browsing on the website, as just looking at them makes your wallet feel lighter.
Prime vs Zoom. Prime lens has only one focal length, which means that it doesn’t “zoom” and the only zoom that is available is “zooming with your own feet” (get closer or farther from the subject to zoom in or out). A logical thought at this point would be “well, gee, if you have zoom lenses, why would anybody need a prime lens?” The answer is: zoom lenses due to complexity of construction do not pass as much light as primes do. And light, my dear friends, for a photographer is everything! So, it’s a trade-off of flexibility vs sharpness and ability to shoot in darker conditions. I would LOVE to have a set of prime lenses for all possible situations, but it’s impractical. It would be expensive, impractical for action shots, and would require a huge camera bag. There are good zoom lenses, such as 28-135 IS that are well built, and cover good amount of focal length for most of the applications. There are many discussions what lens set would make a good starter kit. Here, here, and here are some examples.
One lens that is worth mentioning separately is the Canon EF 50mm f/1.8 lens. This is the best value in the canon lens lineup. Sure, it’s a plastic body (as opposed to metal), and it’s not as durable, but the pictures I LOVE to use it for portraits, as 1.8 aperture will create a beautiful blur.
Auto Focus vs Manual Focus.Most of the modern lenses (tilt-shifts and other exotic animals aside) have auto focus, so it’s not a question of whether or not to buy one with it. Whether or not you choose to use it is a different story. I rely on auto focus 75% of the time, and pay the price every once in a while. In 25% cases (primarily in portraits) I switch to manual. I have a friend who uses manual focus most of the time, so every time he returns my lens (or I borrow his) I have to check the auto focus switch.
As I mentioned before, I am going to use Canon as a case for this series of posts, so here is the first brand-specific post.
There are 3 main classes of Canon DSLR cameras which (somewhat) correlate with their model number ( I include models current to the time of the post):
Rebel (aka NN0D outside of US) – T2i (550D), T1i (500D), XSi (450D), XS (1000D) – Started in 2003 with the original Digital Rebel/300D, this line of cameras is perfect intro into Canon DSLRs. Small and light due to plastic bodies, the Rebels are compatible with the most accessories. All of the models have the “cropped” APS-C chip.
N0D – 50D, 60D – mid-range cameras for pros and serious amateurs. They are heavier and larger than the Rebels, but they have some weather seals, mostly metal bodies (see below), and most of the features of the top line. Similar to the Rebels, they carry the APS-C chip.
ND – 1D Mark III, 1Ds Mark III, 1D Mark IV, 5D Mark II, 7D – the top of the line, creme-de-la-creme cameras for professional photographers. These cameras have the most advanced features, carry a lot of metal and are heaviest in both weight and price tag, but the price you pay gets you a camera that will work after being dropped into mud from a height of an elephant, and could be used as a melee weapon.
Nikon has a similar breakdown into classes with D3 being the flagman and D3000 being the intro.
Canon lineup seems to be drifting, and in the direction I do not really care for: the latest 60D camera, while, according to the model nomenclature, belongs to N0D line, does not have the metal body as its predecessors, such as 50D. At the same time, up until the introduction of 7D, the delineation between the N0D and ND was quite clear with the “pro” level reserved for the 1D/5D cameras. Now, however, at almost half the price of 5D Mk II, 7D places itself closer to the N0D series. 1Ds and 5D models have the full-frame sensor, while others have cropped versions.
While some people may want to invest the most money into the best camera they can afford, in my opinion, one should also remember that the more expensive the camera body is, the more expensive the accessories. While a remote control compatible with the Rebles will cost you about $30, remote controls for the 5D Mk II will require a $700 of disposable income. Sure the more expensive remote has A LOT more features that are useful for the pro, but it all comes down to want-vs-need in combination with sober realization of one’s current abilities as a photographer.
Additionally, there is a cost of lenses to consider. At the current state of technology, one wants to invest the most money into the “glass”, not the electronics. A good lens can serve you for a very long time, across many bodies. The picture will be only as good in terms of clarity, colors and lack of distortion, as the lowest common denominator will allow it to be, so a 1Ds Mk III with an EF 75-300 f/4.0 will make a picture only as good as the lens will allow it.
What it all comes down to? Here is what I think:
Purpose, Frequency of Use, Weight, Size. If you are going to be carrying the camera chasing butterflies in the fields you probably want to start with the Rebels. The same applies if you are traveler-type with ambition to one day make it to the National Geographic, however, if you expect to be in the wild more than walking the streets of foreign cities, you probably want to start with the 50D or 60D due to their sturdiness. And while the 500 gram vs 700 gram difference may not seem significant at first, it will become obvious soon.
Price of Accessories. As I mentioned above, the top line requires the top accessories and deep pockets
On-board Flash. As much as we curse at it, it is used quite often, even if you soften it with a sheet of paper. 1D/5D camera bodies do not have a built in flashes, so you will have to purchase a separate flash.
Video Capabilities. The newest cameras have video capabilities with a variety of quality levels spread out between the Rebel T1i with basic specs and 5D Mark II (logically) with top of the line specs (the season finale of House MD Season 6 was shot entirely using Canon 5D Mark II).
LCD Size and Brightness. On a bright sunny day outside, a bigger, crispier LCD certainly helps checking if the picture needs to be re-taken. For some people, LiveView is also important. Initially, the DSLRs had very limited LiveView capabilities, but modern cameras have addressed most of the issues. Personally, I prefer the viewfinder.
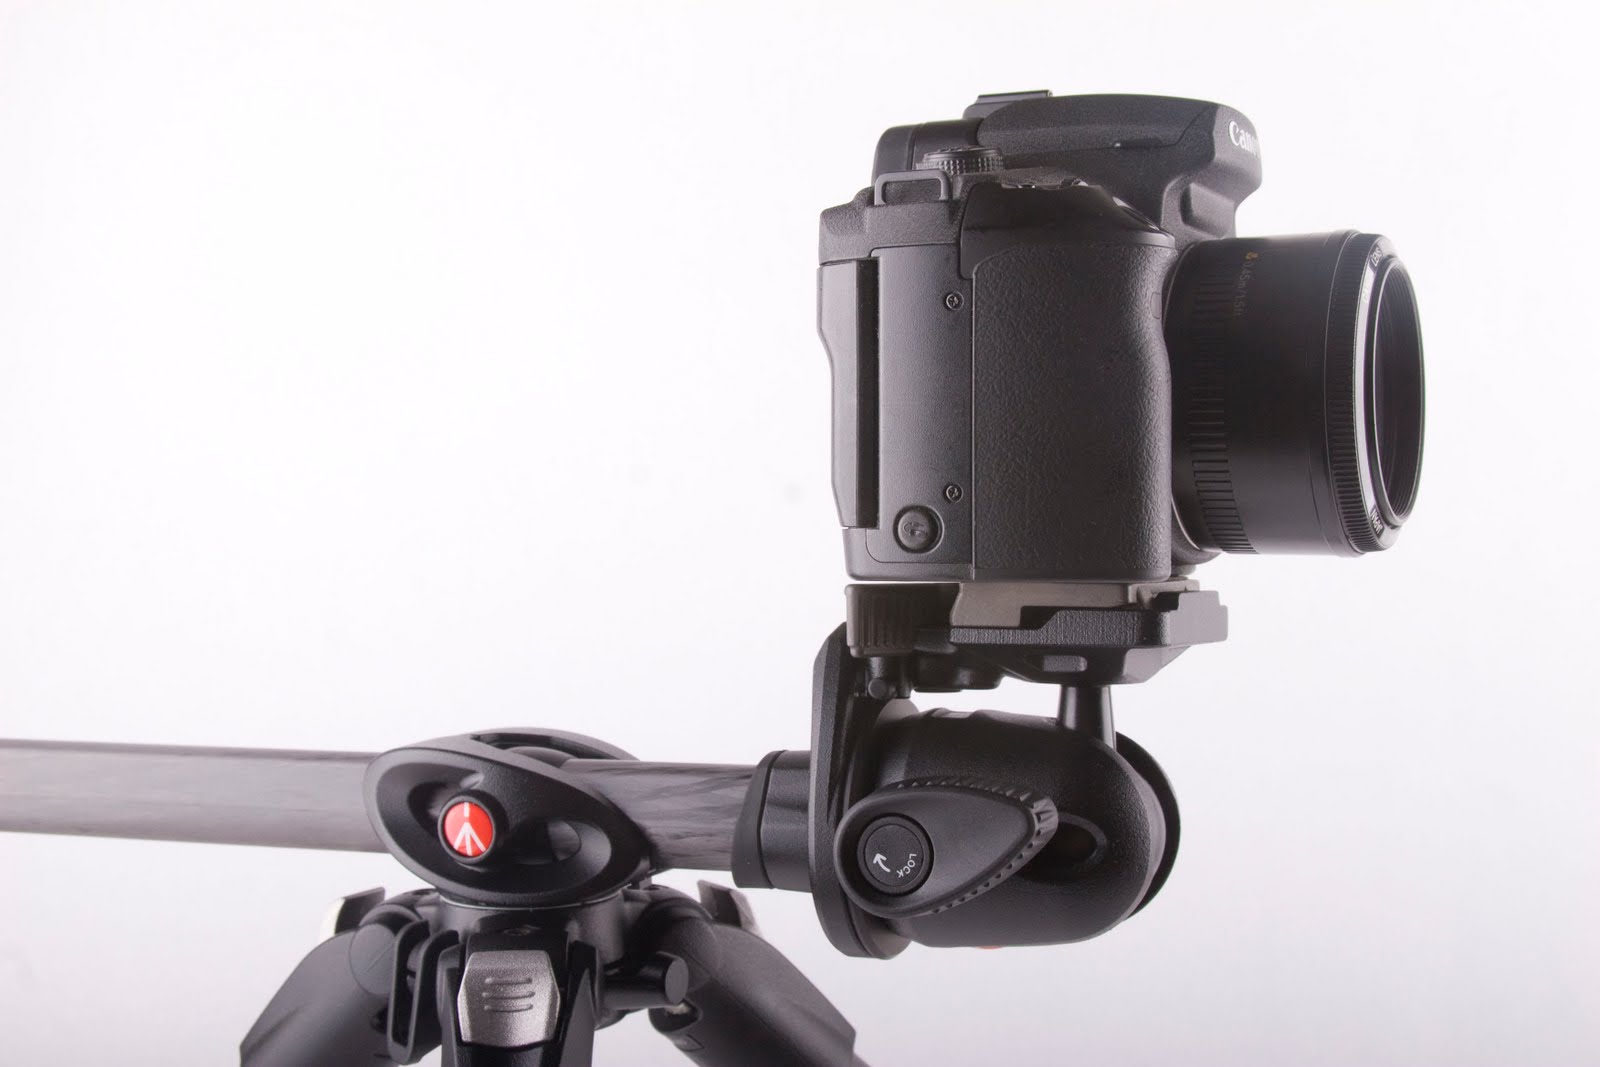
Today I received my 496RC2 (the 494, 496, and 498 come with RC2 quick-release plates, and 498 also comes with RC4 quick-release plate) in the mail from Adorama and got a chance to play with it. I once bought a 484 ball head when i needed something small to put on my tripod, but I returned it soon thereafter, as I found it too small and got myslef an 804RC2 3-way head.
There are few features that improve on what already is a great device. In particular, all of the heads, except for the smallest have friction adjustment, which is great – really puts this head on par with the 222 Joystick (Grip) Head.
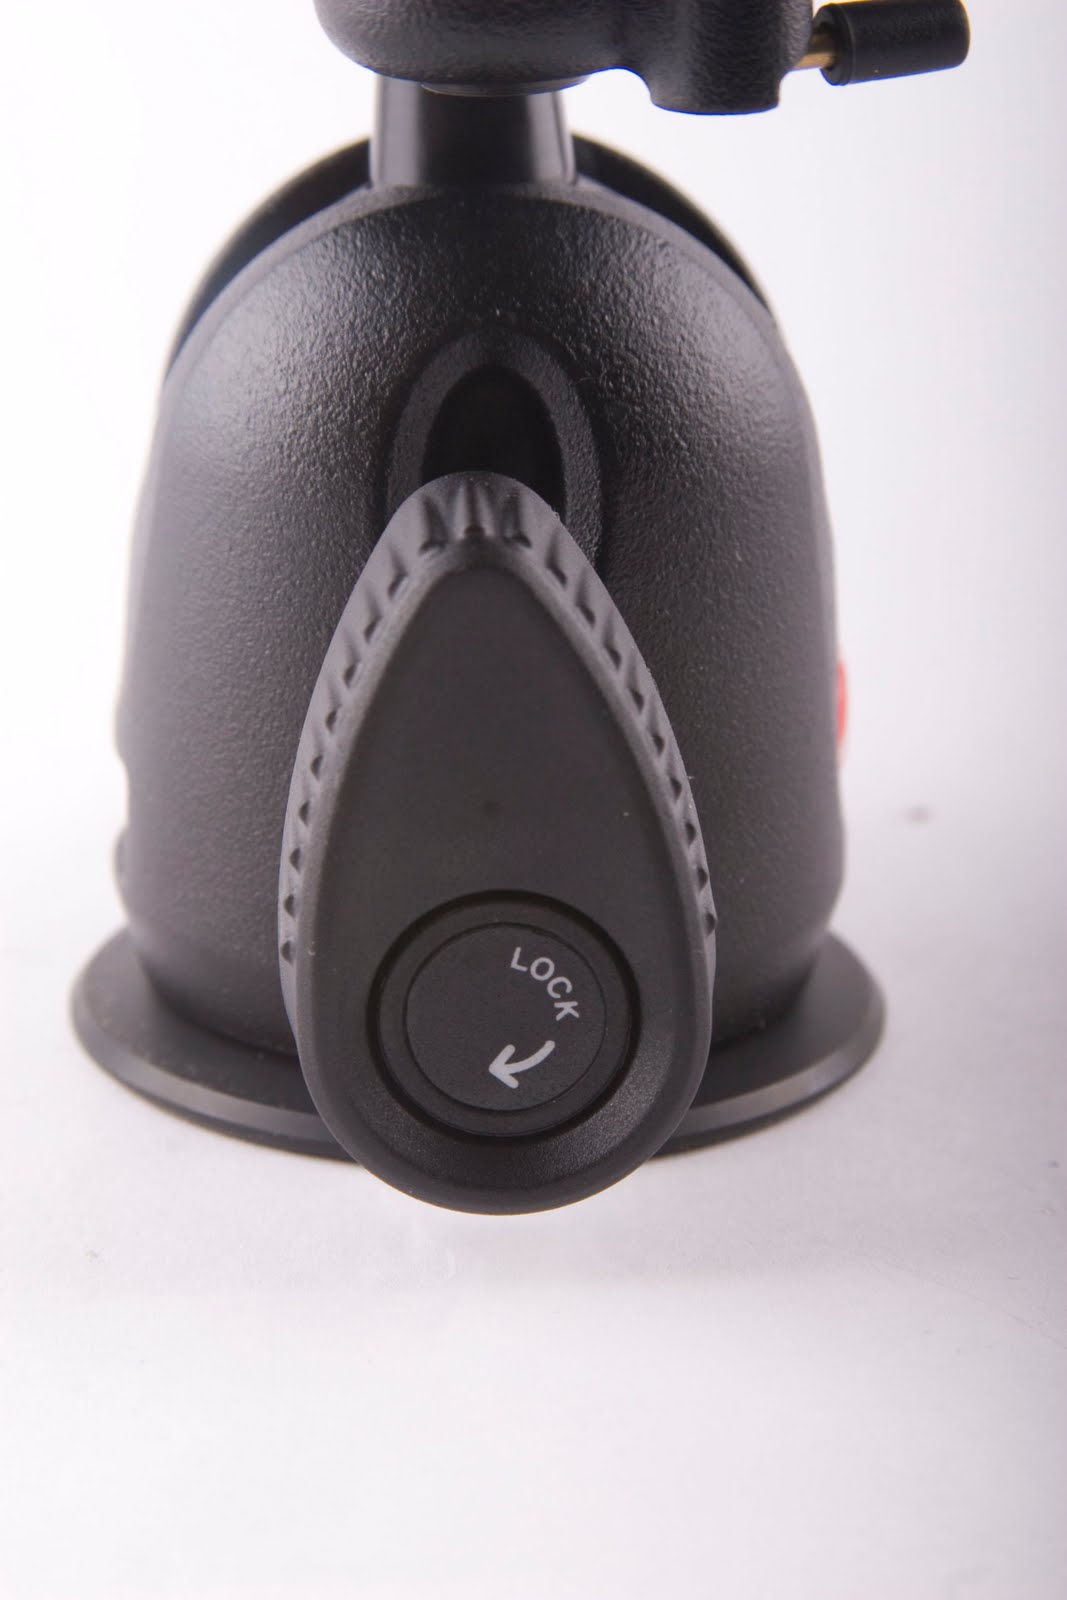
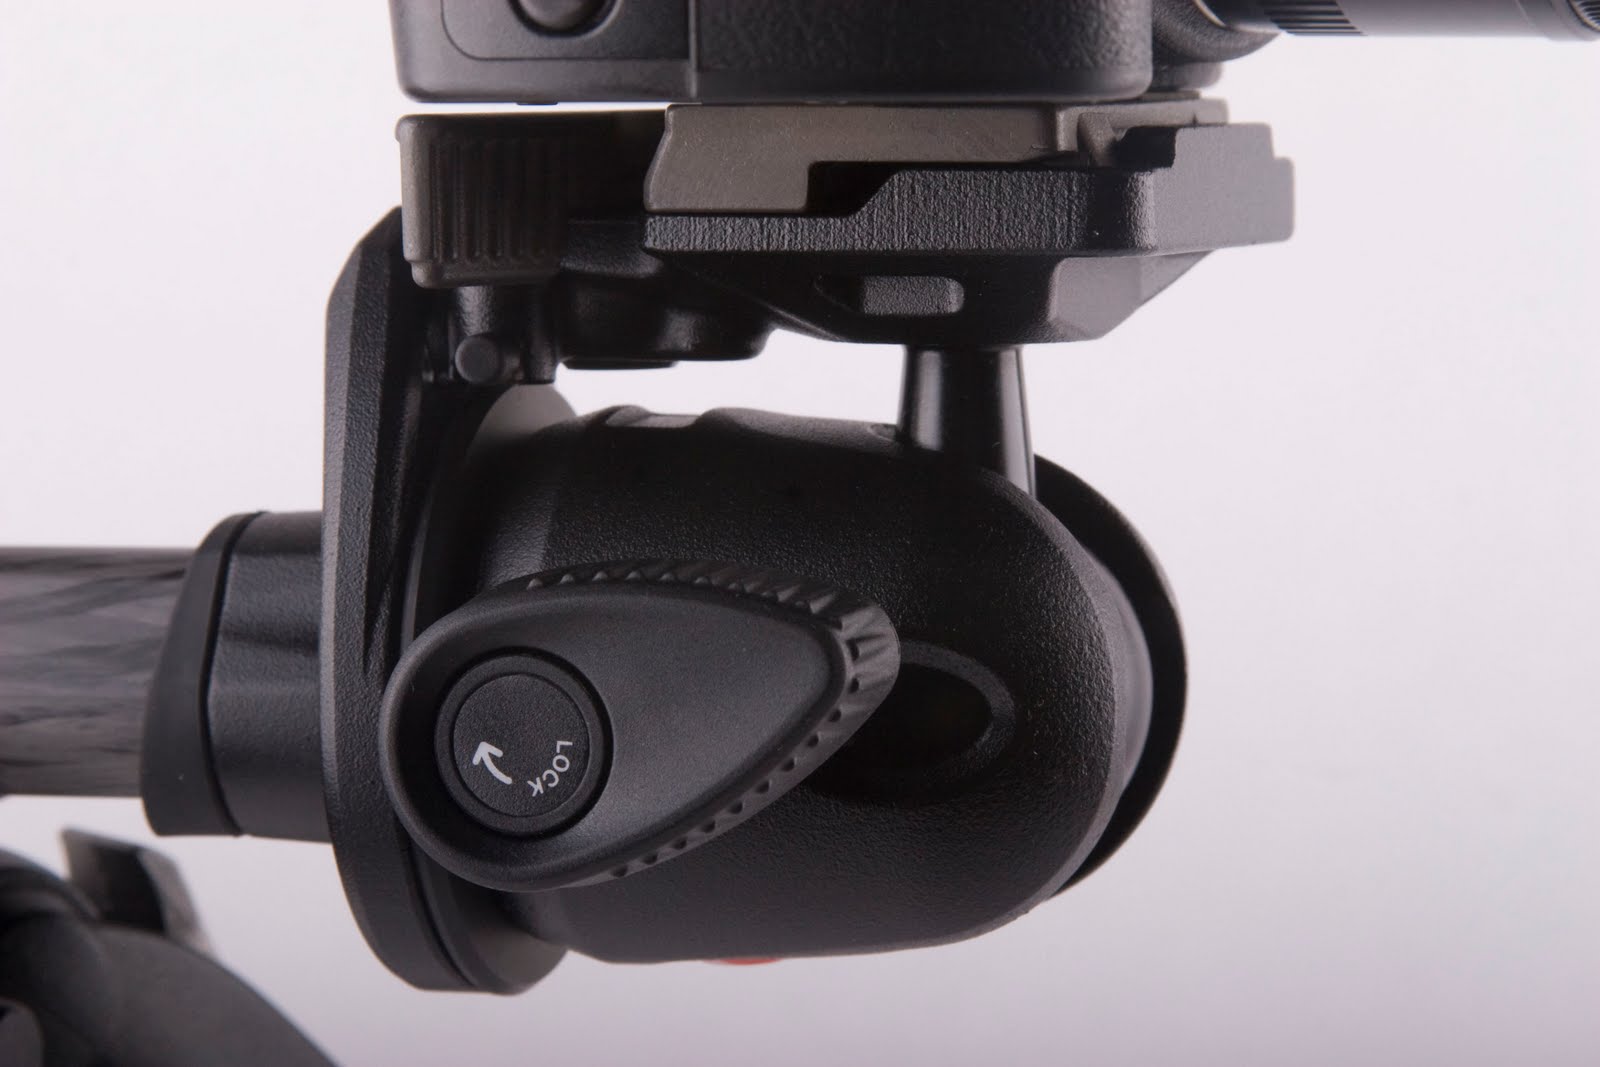
Lock knob (as well as the friction knob) is now a little more ergonomic – fingers are less likely to slip off the surface (486 had flat edges).
All models have 360 degree panoramic rotation. The 498 model has a separate pan lock.
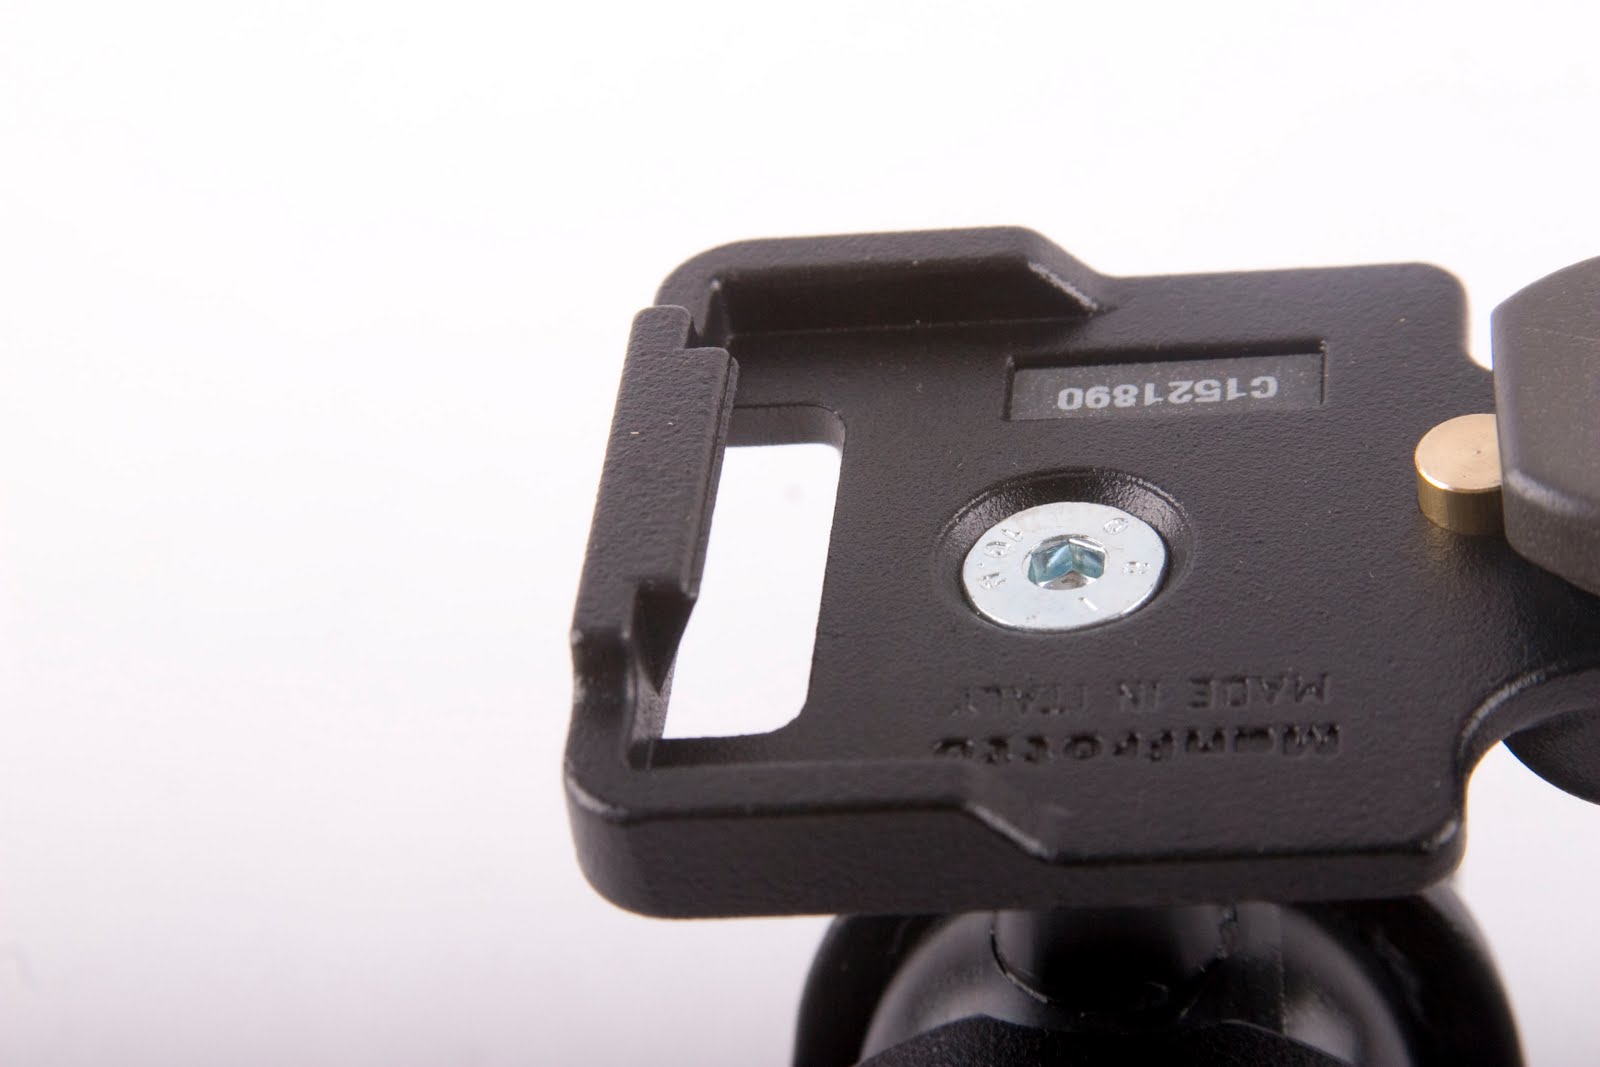
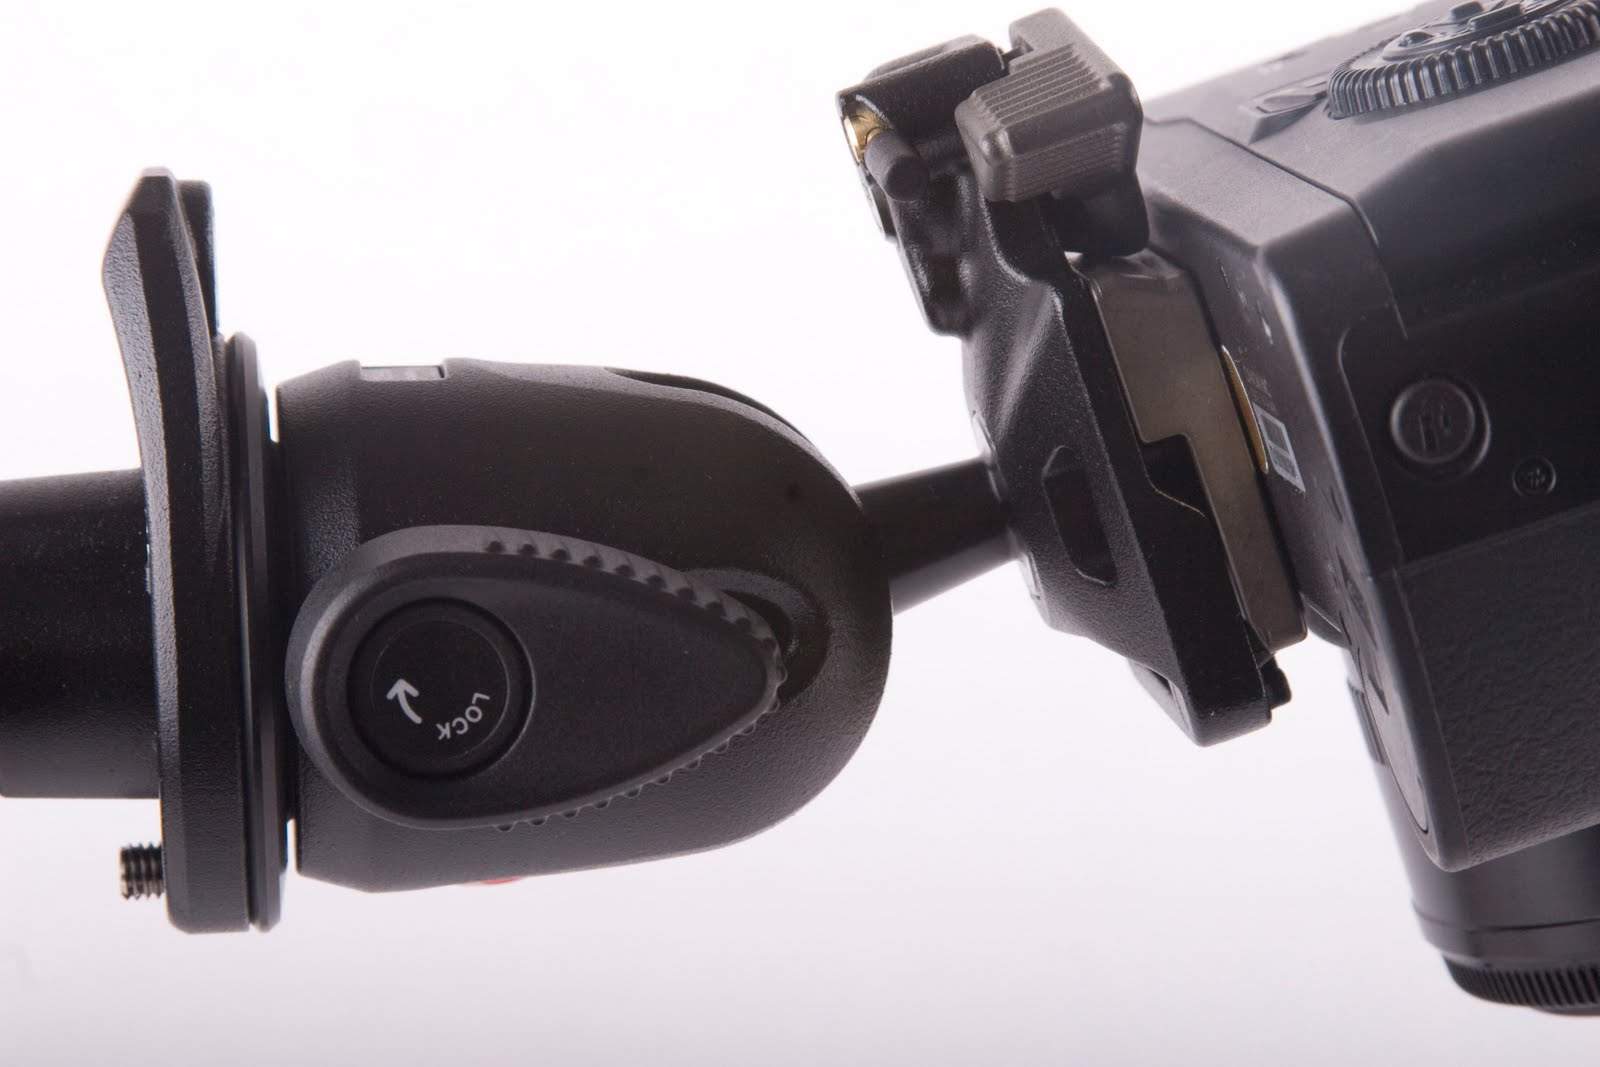
It seems engineers at Manfrotto put additional thought into making the head lighter without sacrificing the strength – the 496RC2 weighs in at 0.93 lbs. – lighter than 1.01 lbs of its predecessor – may not seem like much, but I am sure it will make a difference on a hike or in carry-on. The way it was achieved is cutouts on the sides
… as well as on the release plate assembly
I know I’ll be taking this head on the trips, rather than the 1.72 lbs 222 joystick.
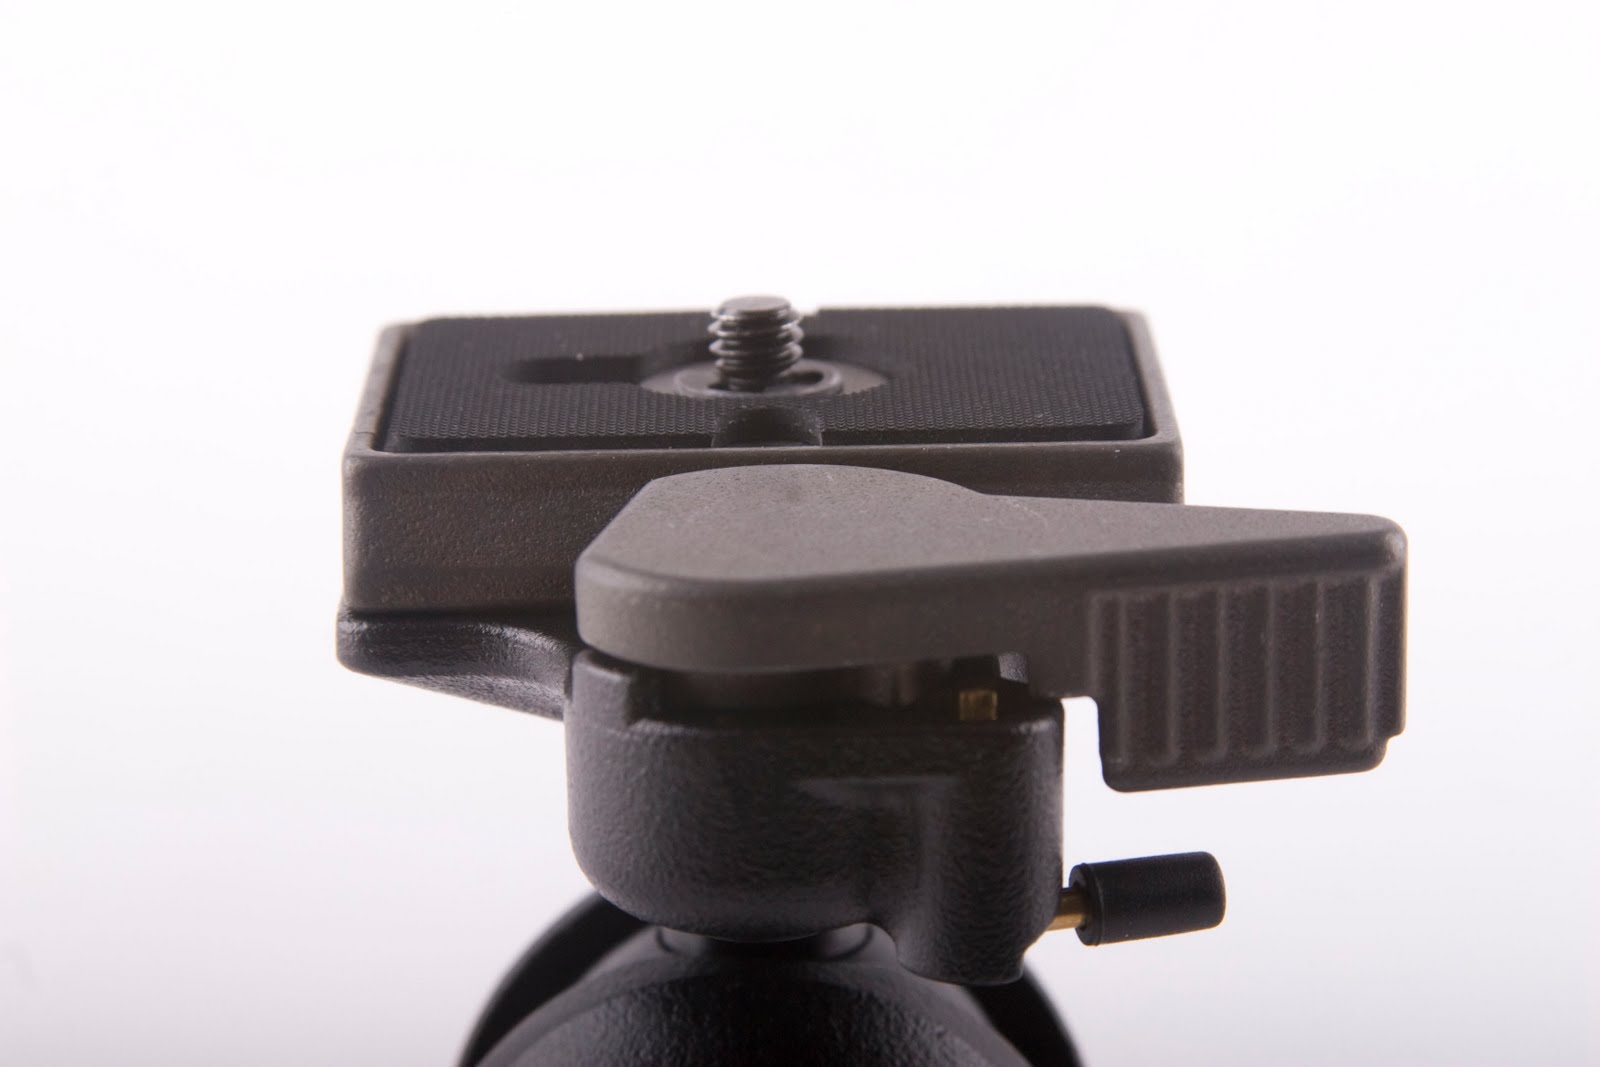
The only one problem i may have with this head is the quick release safety – it does not stay in unlocked position (as it does on 222, for example). I would really prefer it to stay unlocked so it’s easier to operate the release with one finger.
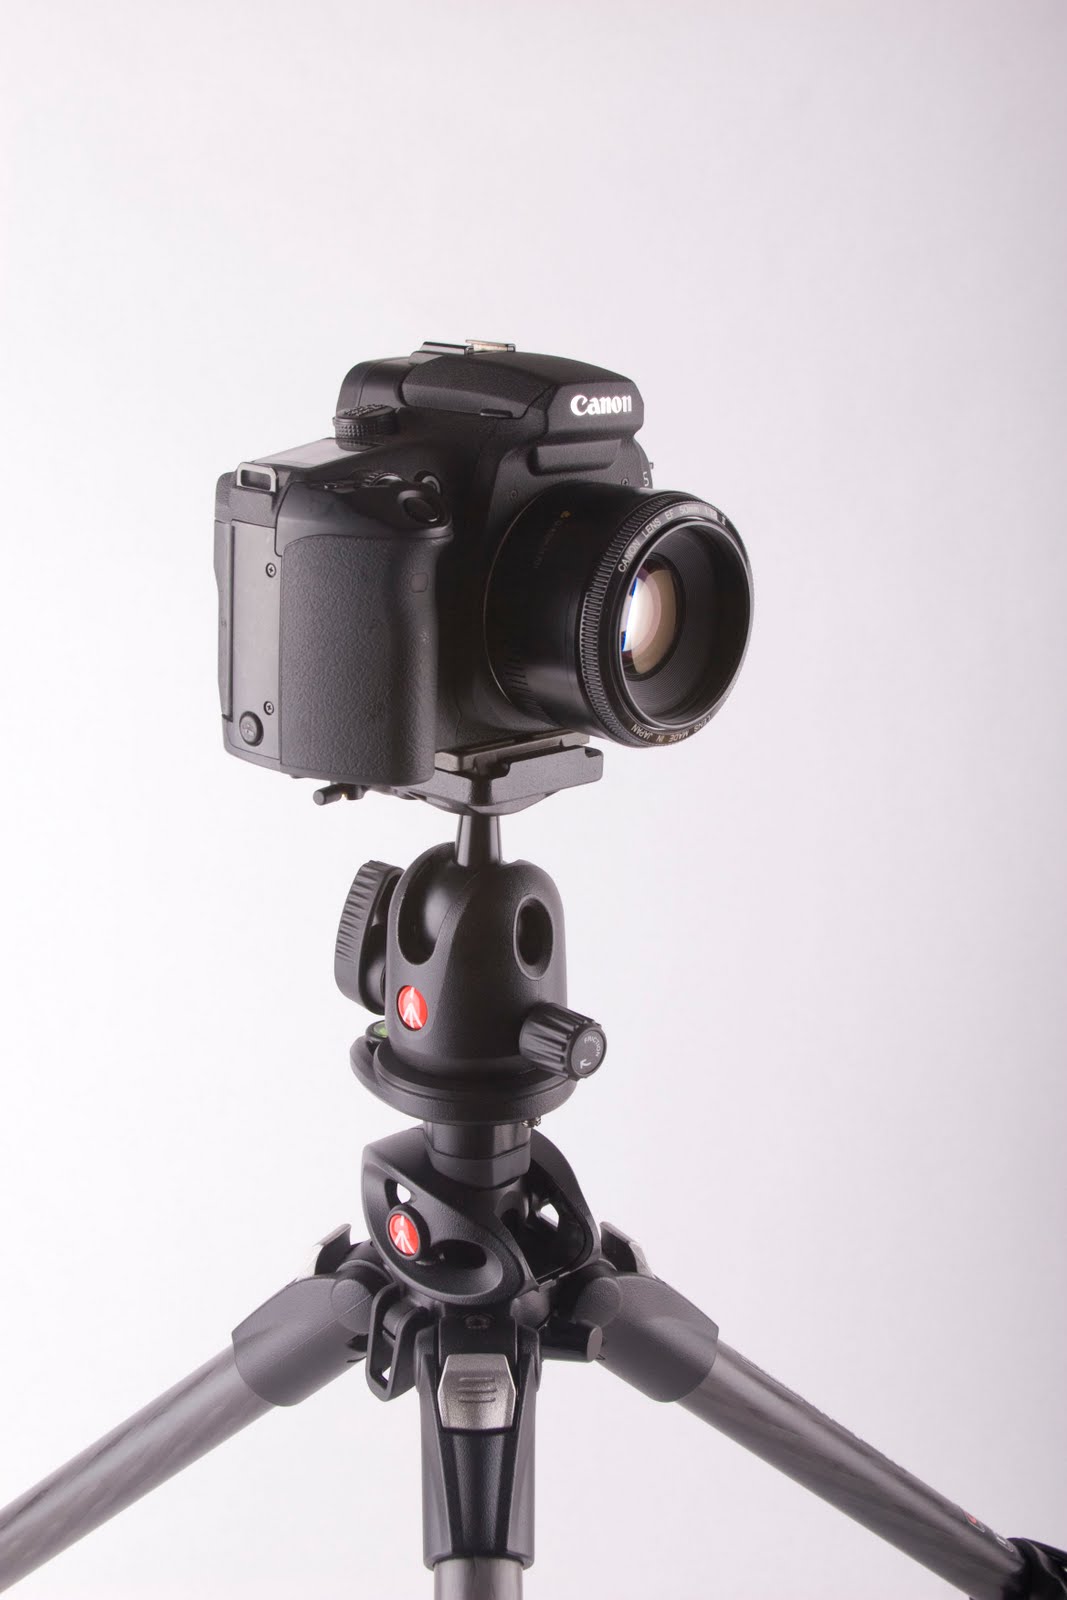
Overall, this is a great head, and I am thinking of selling my 222 in the near future. The construction is solid (as is always the case with Manfrotto), supports decent amount of weight (496 RC2 supports 13.23 lbs). I probably would not ditch a 486RC2 head if I had one to buy 496RC2, but as a new purchase of this type of head – this is definitely a “go”.
Here are few shots of the head on its own and mounted on my 190 CXPRO4.