With winter coming (way too) soon, I decided to add heated seats to my s/o’s car, and here is my experience. Overall, so far I am very satisfied with the product, despite few minor things that I would change.
Ordering
After a little bit of research online, I came up with HeatedSeatKits.com (HSK), also known as Autowarm.com as a potential source of the kits. The kits I got were Innovative Heat II kits which cost $90 and come with 2 heat settings and are advertised as their most popular and universal model. Each kit includes two pads – one for bottom cushion and one for back cushion – wiring harness and 3-position switch.
I placed order on their website on Monday morning, via fairly simple process. The $90 includes shipping, and in addition I bought a suggested $20 installation kit, for the total of $200. One thing that bothered me a little was the fact that when I placed the order, I did not receive a confirmation email that would contain any kind of order information. However, I did not get to wonder about that for too long because, to my surprise, I found my order at my doorstep on Tuesday! the order was shipped from WA to CT via USPS and got there in one day. That’s impressive, I have to say.
As it turns out, there is a page where you can find status of the order and even order reference # using full name OR a zip code (!), but I still believe these days email is a must.
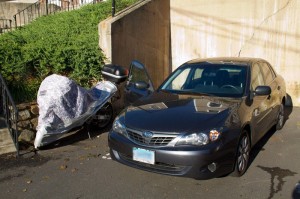
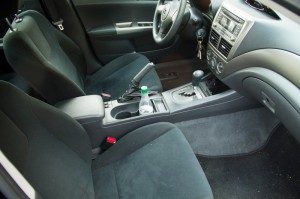
And so, off the the races. Here is the target (the one of the right, not the one on the left, though, HSK sells a heated seat kit for motorcycles, and I am curious about it):
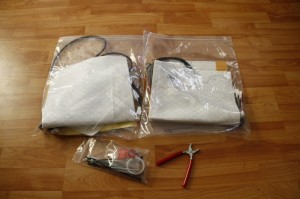
Here is what the kits look like:
Installation Manual(s)
One curious thing is that the kits do not contain installation manual. Instead, there is a sheet of paper that informs the recipient that manuals are not sent as a part of being more environmentally friendly, but PDF manuals can be found online. The link given leads to autowarm.com/manuals page that contains 3 different manuals. Alternatively, a manual can also be found under Installation tab on HSK’s site in both PDF and HTML format (“HTML format”, in this case being collection of 7 images – one for each page, NOT a searcheable page).
All of the manuals refer to separate “bottom” and “back” pads, difference being the bottom pad having 4-wire connector versus 2-wire connector in the back pad. According to the manual, the bottom pad contains temperature sensor. Both of the kits I received, however, contain identical pads – with only two wires coming out (the wiring harness also only contains 2-wire connectors for pads). The pads, however, clearly have some electronic element stitched in them, which could be temp sensors (afterall, all the element needs to do is turn off the power once the temperature of the pad reaches certain level, it can be done “locally”, on the given pad, vs sending signal back to the wiring harness and relay).
To make sure, however, I wanted to contact HSK tech support. Unfortunately, HSK does not have a technical support to call, and questions need to be submitted via online trouble ticket system. HSK took about 4 hours to reply and their reply was: “Yes, that is correct as the new models come with two 2-wire elements. They are interchangeable so the elements can go on any cushion. The instruction manuals are universal, therefore that does not apply to the new models.” Given that they maintain multiple different manuals online and don’t print them anyways, they could have done a slightly better job with manuals, but oh well.
Installation
Airbags
2008 Subaru Impreza comes with SRS sidebags installed on window side of each seat, and therefore, before removing seats (which will involve disconnecting the airbag wiring), it’s important to disconnect the battery (the installation manual mentions it as well) and wait for a few minutes, to avoid having to go to a dealership to fix “Airbag Warning” light. I’m no mechanic, but as I understand it, car’s computer(s) test airbag system and if they find one of the airbags not “online”, warning light is lit, and even if the bag is reconnected later, the system is considered compromised and needs the be checked.
Upholstery
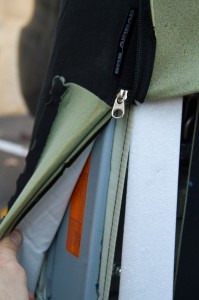
After disconnecting the battery and removing the seat (which in Subie is attached to the body via 4 bolts), the next step is to open the upholstery for both bottom and back cushions. The manual suggests disassembling the seat to separate the back and the bottom, but I didn’t feel like having to deal with the springs and sliding mechanism (mind you, this Subie has manual adjustments, not electronic ones), so I simply started lifting the seat covers hoping to be able to insert the pads, once I get access to most area of each cushion.
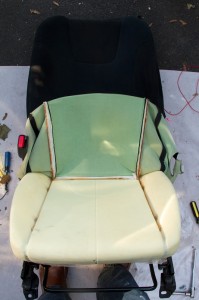
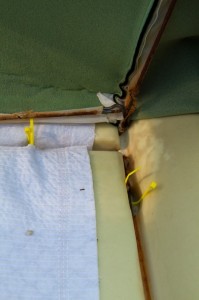
Here is the view of the bottom of the driver’s seat with covers lifted.
The stitching on the seats (which keeps the covers from sliding) is attached to the seat springs using small metal rings, known as hog rings, which need to be removed. I’ve never dealt with upholstery, and frankly, I found the process a real pain the butt, but eventually I figured out a way to do it using pliers (the installation kit included hog ring pliers, but I couldn’t figure out how to use them, nor was the tool’s handles were large enough to produce enough leverage). When putting the seats back together, I used zip-ties instead of hog rings, as metal hog rings would conduct electricity to the spring, which in best case would mess up the flow of electricity, and in worst case cause a short.
Fitting
The pads can be shortened (I ended up cutting the pads for the “backs” of the seats), but not cut in width – they are about 11 inches wide. If the pad’s placement happens to be under a stitch line holes may be made to place hog rings (or zip-ties) to connect the stitch line with the springs of the seat. One of the stitch lines on Subie’s seats is parallel to lateral axis, so one way or another, I’d have to have heating pad going through it, which means having to make at least two holes in the pad itself. Manual describes the process of making holes which is fairly easy to follow.
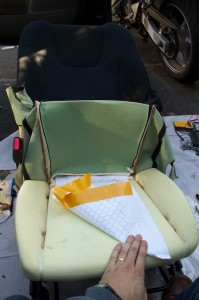
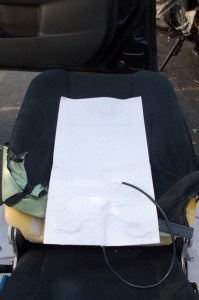
After cutting the holes and pulling the wire to the back of the seat, I placed the pad and started to pull off the paper that protects the sticky “sides” of the pad.
With the pad placed on the seat cushion, it’s time to put everything back together. First things first – prepare the new “hog rings” – zip-ties:
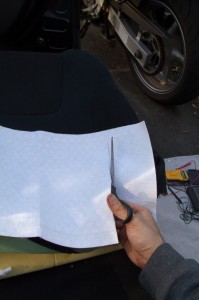
Before fully closing the bottom cushion, I switched to the back of the seat. The steps are the same: lift the cover, place the pad, close the cover. In my case, I had to shorten the pad in order to fit it in the seat. Here is marking the pad before cutting (you can see a faint line made by pencil on the pad).
I chose not to fit the pad all the way to the top of the seat because that would require removing entire cover, which, in turn, would make me disassemble the seat. I figured most of the heat is felt in the lower back anyways. Here is the cutting
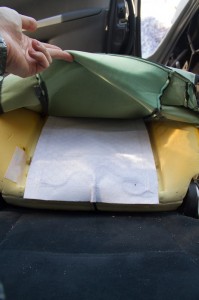
And here is the placed pad before putting the cover back on.
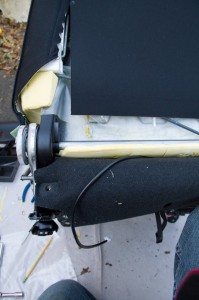
Here is the view of the SRS bag. Proceed carefully, try not to drop the seat onto that side 🙂
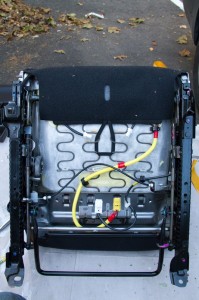
Here is the view of the wires run in the back. I ran wires from both pads to the side and under the bottom cushion’s flap.
Here is what the driver’s seat looks like at the end – you can see two black wires coming out from under the flap. The passenger’s seat is very similar, but it also has a sensor, so wiring is a little more convoluted.
Wiring
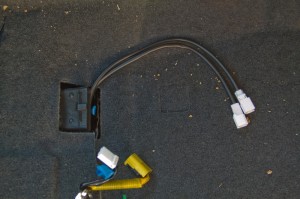
The wiring harness is a relay unit which has one 2-wire power connector, one 3-wire switch connector, and two 2-wire pad connectors. pad connectors are by far the shortest ones (about 12 inches or so), and power and switch connectors approximately 40 inches. I initially thought of placing the harness itself on the seat itself, since the pad wires are the shortest ones, and running the wires for power and switches from there. Unfortunately, the connectors on the power and switch cable are much on the opposite side of the wires from the relay unit, which would mean that they would end up somewhere underneath the central console, and if I ever had to remove the seats, I’d have to get in there in order to disconnect the wiring. Because of this, I placed the relay unit under the floor with pad wires being connected to the seat. Their length was just enough to support the full range of motion of the seat, and now to remove the seat I have to disconnect the pad wires. This takes care of the seat wiring, but still leaves out the power and control wires. While both of the wires are long, the connectors are located differently – control wire connector is about 6 inches from the switch itself while power connector is about half-way through the length, placing it under carpet on vertical side of transmission tunnel under central console. Maybe a small nitpicking, but I would prefer if the power connector was next to control connector which would make it accessible once the central console is lifted.
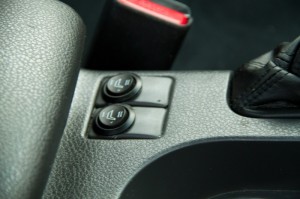
Subie comes with placeholders for the heated seats switches on the central console, which is where I decided to place the switches. Eventually, I’d like to get the stock switches, but for now I went with the ones provided with the kit. Luckily, armrest also contains cigarette lighter socket, which perfect for tapping into for power (it’s inside the armrest, so will most likely be used for charging an ipod or something similar, without much consumption).
Here is the view of the final result:
Tools
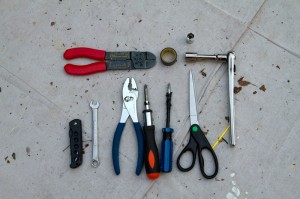
I ended up not using the installation kit provided apart from the wire tap-ins. Here are all the tools I used:
- Wire cutters
- Insulation Tape
- Flat Screwdriver
- Philips Screwdriver
- Pliers
- Knife
- 12mm socket
- 14mm socket
- Scissors
- Zip-ties
- 10mm wrench (to disconnect the battery)
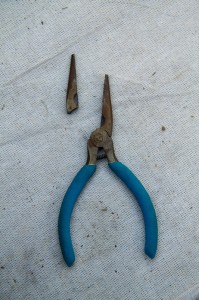
Lesson of the day: “Invest into good quality tools” – the old pliers that I had (got them from one of those cheapo toolkits) broke when I tried to use them to remove the hog rings.
Use
After putting everything back together, I tested the seats with… well, my own behind. The seats take some time to warm up, but the heat is definitely intense, I would think that it’s even more intense than “stock” heaters on my 2005 Saabaru. I got an impression that the second time the seats heated up more quickly than the first time I turned them on, but it may be an illusion – I will monitor more and will report the observations here.
Conclusion
Overall, I am happy with the kits – it looks like they are well made, the company shipped them quickly, answered my questions expeditiously (always wanted to use this work – ever since I’ve seen Oscar with Sly) and installing them was fairly easy. I would recommend this to people who are comfortable with small DIY projects and know how to work with automotive electronics.
Here is some nit-picking:
- An order confirmation email when the order is placed is a must – come on, people, it’s 21st century
- Manuals leave much to be desired – if you maintain them online, it’s not that difficult to update them – even if you have multiple models
- “HTML format”??? really? it’s a collection of pictures! HTML should be searcheable
- Connectors on power wiring could be closer to the end of wire (away from the relay unit) – this one is due to my placement, YMMV
- “Installation kit” I found useless
[…] […]
Great Review, I just installed a set on my wife’s Subaru and she loves it. My wife wanted seat heaters when we purchased the vehicle but it wasn’t available. These were a present for her, and now she uses them everyday! Installation was easy but it was very labor intensive. Good thing I only have to do it once! I also e-mailed heatedseatkits.com for support and they answered my questions very quick. Very good product with good support! I’m very pleased with the product, we will be using it more often this winter!
This is an excellent product that works great in my vehicle. Installation was easier than I expected it to be. It turns out I spent too much time reading the instructions and getting confused. In hindsight I should have just opened the package and gone to work. As has been stated the ordering process is less than ideal. The website says you can order using Mastercard, American Express, or Paypal, but on the “checkout” page I did not see an option for Paypal, so I used my American Express. I entered my credit card and then a page came up stating my order was placed. There was no confirmation number, no email, no way to follow up. This was expected since I had read this review prior to ordering, but somewhat unsettling. Especially when I went to check on my order using the link (shown above) and there was no record of my order, not even a week later. I tried calling the 1-800 number on their website and there was no answer. I left a message and nobody called back. I sent them an email and nobody responded. So I called American Express and cancelled the charges. Sure enough, the next day the package appeared on my front porch, and I had to call back to the credit card to reverse my dispute. So, in the end, I do recommend this great product, and have had a couple of friends install it successfully in their vehicles, but you’ll need an extra dose of patience dealing with the company’s lack of customer service.
Thanks for taking the time for this FANTASTIC how to instructions, I am in the process of looking for a highly rated seat heater kit and goto install into my Pontiac Solstice… Thx again this sure has been a big help before I start this project 🙂
Thanks for the amazing DIY instructions! I purchased the product from heatedseatkits.com and it came very quick in the mail as well. I installed them using your tutorial and some tips from the instruction manual that came with the seat heaters. My wife loves them so much, we are fighting to see who will turn them on first when we get into the car. I didn’t know these things existed until I found your web page! Now all my cars can have aftermarket seat heaters!
Thanks for the great tips, it took me about four hours to complete the install. Without your instructions, it would have take me probably twice as long! After installation, I cannot even tell if they were factory seat heaters! They are perfect to turn on at night. I purchased my kits from heatedseatkits.com as well and they were delivered within two days.