FZ6 “Naked Conversion”

After being tempted for a very long time, I’ve finally decided to pull the trigger on naked conversion of my FZ6, and over the course of a few days of my vacation, I was able to complete it designating only a couple of hours a day.

transition

Parts List:

– MT03 headlight bought on ebay with cheapo brackets

– Speedometer bracket made by a fellow 600riders.com member Puttin Along

– Speedometer cover bought on ebay

– Bracket extension and turn signal holder that I made out of aluminum

– Rizoma Dynamic mirrors + Rizoma mirror adapter from motostrano.com

– Black Emgo Universal mirror mount from Amazon

– Set of electrical connectors matching my bike’s from corsa-technic.com

– 2 pairs of cylindrical spacers

– Button-head socket cap M6 screws: 2x30mm, 4x20mm, 4x15mm with washers, lock washers and nuts


Headlight:

I’ve ordered the headlight from ebay, and it was delivered within 6 days (including a weekend in between).

The headlight is LSL MT-03 headlight. I opted for this particular item because I couldn’t justify spending $400+ on the same headlight with higher quality brackets sold by moto-madness. If I could – I’d definitely do it.

The kit comes with 2 brackets, 2 43mm fork clamps and 6 button head socket cap screws:

MT03 ebay kit

The brackets are relatively cheap, bear traces of fabrication, but seem to be sturdy enough:

brackets and screws back of brackets brackets, screws and clamps

My guess is that intention here was for these brackets to “hug” the headlight (horizontal distance between upper attachment points is greater than between lower points), but since I already had to buy spacers to have brackets aligned with forks, I chose sizes that allowed brackets to stay straight. The sizing is of by a few millimeters (I got 1/2 inch and 1 inch), but it’s much better, in my opinion, than what it would be otherwise. Because of the spacers, I had to buy longer screws.

Yes, they are from Home Depot. No, these are the only parts I got there, and only because I was at HD for another project.

spacers

Here is the resulting look with spacers highlighted:

spacers installed

The next on “to fix” list is screws that came with clamps – replaced them with the stainless steel ones that I now had as spares:

clamp bolts

Next comes, the most labor-intensive part, at least for my version of installation. As I mentioned above, if brackets are attached to the clamps, the only way to install the headlight on fz6 is much further down the fork so that the headlight “clears” the ignition lock cylinder. This would also mean moving the horn elsewhere (now, I am going to replace it with something a little louder, but that’s in the future). Instead, I decided to fabricate my own spacers out of aluminum (Yes, it’s from Home Depot, no, it’s not a part, so I wasn’t lying when I said that spacers were the only parts I bought there).

I scientifically guesstimated (by holding the headlight with bracket next to the forks and measuring) that I needed about 3 cm of space between the center of clamp bolt and the hole in the brackets, but I also wanted to mount my turn signals somewhere, so the total offset is 39mm. I chose two attachment points on bracket so that it keeps the angle constant. The other end is wide enough and square, so it sits against the clamp and doesn’t rotate even with vibrations.

First, I’ve put together cardboard mock-ups that would let me judge the angle and distance:

cardboard

cardboard upclose

That looked like a decent fit, so I went ahead with aluminum. No CNC machine for me, so good-old fashion hand tools. In process, I learned that Dremel 400 is NOT the right tool of choice for cutting aluminum – I was faster with a hand saw. Somebody more used to work with tools would probably know that, but I didn’t:

0629161306

0629161355

Electrical:

With extension done, it was time to figure out electrical. I chose the more difficult way – I planned for making changes reversible, so I wanted to make a shorter replacement for the harness, rather than cutting the harness or the wires on the bike. I decided not to use the original harness and re-route wires, as I didn’t find enough space inside the frame to fit two connectors. I had ordered the connectors from corsa-technic.com (I found out about it from 600riders.com, just like tons of other useful info) and went to re-create the harness.

0630161134

0630161311a

No major issues, the only thing that was difficult was having to deal with only 4 colors of wires (red, black, green, blue), and not wider variety – in retrospect, I should’ve ordered additional colors – I had to use black permanent marker for stripes (not sure if it will withstand the test of time) and documenting the new harness took a while. Here is what it looks like now, but I’ll be making a more official version in Visio, because in 2 weeks I won’t be able to decypher what I wrote there.

0701161625

After some thorough testing side-by-side with the original harness and wiring schema, I wrapped it all up in lots and lots of insulation tape.

Speedometer:

Well, this one was the easiest, by far. Fellow 600riders.com forum member Puttin Along started puttin together (see what I did there?) brackets for S1 speedo, so I ordered one. It came by mail in 3 days, and it fit perfectly:

Here is the bracket:

0627160921

And here it’s installed:

0627160924

The back cover came from ebay – I only had to remove the bottom piece to install. Here is what it all looks like assembled:

0630161418a

And here is the look from above:

0630161419-2


Mirrors:

I really want to like them – these are Rizoma Dynamic mirrors, afterall – fantastic finish, great design, stylish, but… what am I supposed to see in them? I think these are one step too far in the wrong direction on style-function continuum. That’s just me, but I need to see a bit more of what’s behind me. I’ll ride with them for a few days, but I think I’m going for a different model.

So, here is the after:

After


Skully Helmets – Motorcycle Helmets with Android-based HUD display

This is one of those “Must. Get. One.” moments. Skully Helmets decided to implement what many only dreamed of – HUD display in a motorcycle helmet. Better, yet it’s Android-enabled device and they are releasing an API so that developers can add programs to the platform. I don’t know how yet, but I am definitely getting one of these.

They are currently accepting applications for beta-testers.

Review: Bye-bye Fotki.com – story of a good service gone bad

In 2006, I signed up for fotki.com  – a great service at the time. For a small yearly fee of $30, they offered unlimited storage capacity for photo galleries, and provided an alternative solution to all-too-common Flickr and Picasa. I loved the interface and the amount of control over the galleries I had, so I gladly became a premium member for $30 a year.

Over time I’ve accumulated a considerable amount of photos on the site (about 2.7Gb), some of the pictures being originals uploaded to the site. Nothing spectacular, just a lot of my snapshot-taking.

Fast-forward to 2013 when I started considering moving all of my galleries to a different platform – the look and feel of fotki platform has gone stale over 6 years and hadn’t really been updated, nor did it have integration with mobile and interoperability with other services. At that point, in April, a friend of mine who also was using fotki for a while forwarded me an email he received from them in 2012 declaring that to deal with the rising costs, they are forced to introduce a new level of membership that would have “FTP Access to your originals”. So, in essence, they decided to cut off FTP access to the originals I’ve uploaded to their “unlimited storage” hosting, until I pay them for a new level of membership.

That left me a little annoyed, – I can understand that small businesses have to deal with rising costs, and I honestly would have paid an increased membership, but positioning it as a new level and cutting out my access to my uploaded photos rather than to new galleries – that’s a little too much. At this point, however, I’ve already found a suitable replacement – smugmug.com and was ready to move on. So, I paid the additional $30 for Premium Gold membership – if anything to just get my photos out.

After downloading all of the galleries, something odd attracted my attention – the total size of the downloaded folders was just over 200 Mbs, meanwhile the amount of storage used on the server was 2.7 Gbs. When I contacted their support, they explained that not all of the originals were online because they were affected by Hurricane Sandy in 2012 and had to move to a different datacenter, and that the remaining originals will be back online “in a few weeks”. When, in my opinion, reasonably I asked for a refund for my just paid Premium Gold membership, I was told that they “don’t offer refunds”!

I’m not going to post what I think of them. One simple fact – I contacted their support in April 2013. It’s been 4 months and during this time nothing has changed. Every time they get back to me, it’s “a few weeks” and “few more weeks”. I’m about to close the account, giving up on some of my originals.

Final Thoughts: It’s really sad to see a good business gone bad. I’m not sure what happened – maybe they didn’t scale up to make the numbers work, maybe they changed management (I haven’t really looked through their blog – it now starts to show errors left and right, so something tells me the infrastructure is about to go). I am certainly left with a bad aftertaste and feeling cheated by what originally was a good and promising service. Bye-bye, fotki.com!

Fast Forward 1 Year

… and it’s been another year.

Time flies – I see that the last post I made was exactly one year ago – the hiatus was caused by two things – last year around this time I had been unemployed for almost six months and it started getting to me. From that point on, things were not going well for a while until mid-summer I found the job and moved. Since then, my life has been a start-up-fueled marathon of working long hours. Looking back on the period of unemployment, I’ve learned a lot about myself especially on how long I can stay upbeat in adverse environment and how my inability to find a job affects my personal life and, through me, people around me.

Some changes that happened during the past year:

– In a tragic accident, we lost our dog Kali last June (while we were in Yellowstone NP). To cope with the loss we got another puppy (we found out that for us it was best to get a new pet immediately, despite many people recommending otherwise) – a german shepherd/border collie/something-very-small mix that could solve the world’s energy problem, if only I find a way to harness all that energy.

– I found a new job at a small software startup – long hours and “hands-on” are back!

– I’ve expanded my set of video cameras by adding GoPro Hero 3 and am starting to consider selling ATC9K – I guess I’m a GoPro convert, as much  as I tried to resist going with “mainstream”

Life goes on, and I’m back.

Ads

HeatedSeatKits.com Heated Seat Kit Review & Installation

With winter coming (way too) soon, I decided to add heated seats to my s/o’s car, and here is my experience. Overall, so far I am very satisfied with the product, despite few minor things that I would change.
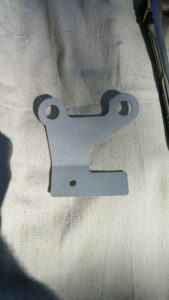
Ordering

After a little bit of research online, I came up with HeatedSeatKits.com (HSK), also known as Autowarm.com as a potential source of the kits. The kits I got were Innovative Heat II kits which cost $90 and come with 2 heat settings and are advertised as their most popular and universal model. Each kit includes two pads – one for bottom cushion and one for back cushion – wiring harness and 3-position switch.

I placed order on their website on Monday morning, via fairly simple process. The $90 includes shipping, and in addition I bought a suggested $20 installation kit, for the total of $200. One thing that bothered me a little was the fact that when I placed the order, I did not receive a confirmation email that would contain any kind of order information. However, I did not get to wonder about that for too long because, to my surprise, I found my order at my doorstep on Tuesday! the order was shipped from WA to CT via USPS and got there in one day. That’s impressive, I have to say.

As it turns out, there is a page where you can find status of the order and even order reference # using full name OR a zip code (!), but I still believe these days email is a must.

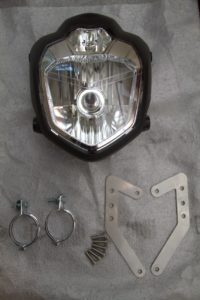
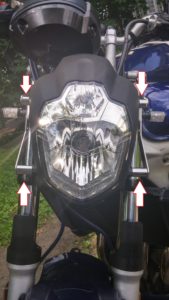
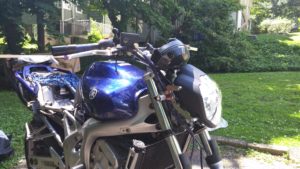
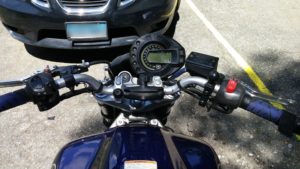
And so, off the the races. Here is the target (the one of the right, not the one on the left, though, HSK sells a heated seat kit for motorcycles, and I am curious about it):

Target: Subaru Impreza 2008

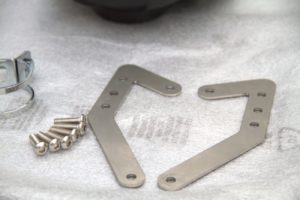
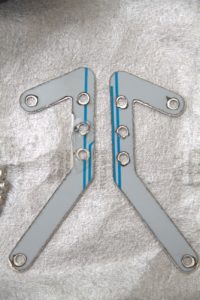
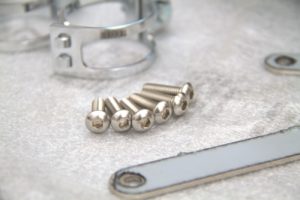
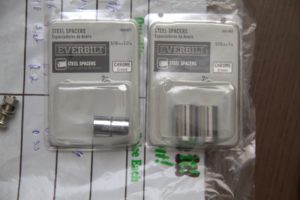
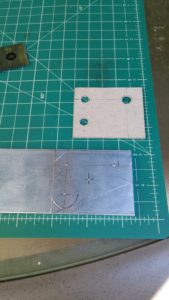
Here is what the kits look like:

Heated Seat Kits


Installation Manual(s)

One curious thing is that the kits do not contain installation manual. Instead, there is a sheet of paper that informs the recipient that manuals are not sent as a part of being more environmentally friendly, but PDF manuals can be found online. The link given leads to autowarm.com/manuals page that contains 3 different manuals. Alternatively, a manual can also be found under Installation tab on HSK’s site in both PDF and HTML format (“HTML format”, in this case being collection of 7 images – one for each page, NOT a searcheable page).

All of the manuals refer to separate “bottom” and “back” pads, difference being the bottom pad having 4-wire connector versus 2-wire connector in the back pad. According to the manual, the bottom pad contains temperature sensor. Both of the kits I received, however, contain identical pads – with only two wires coming out (the wiring harness also only contains 2-wire connectors for pads). The pads, however, clearly have some electronic element stitched in them, which could be temp sensors (afterall, all the element needs to do is turn off the power once the temperature of the pad reaches certain level, it can be done “locally”, on the given pad, vs sending signal back to the wiring harness and relay).

To make sure, however, I wanted to contact HSK tech support. Unfortunately, HSK does not have a technical support to call, and questions need to be submitted via online trouble ticket system. HSK took about 4 hours to reply and their reply was: “Yes, that is correct as the new models come with two 2-wire elements. They are interchangeable so the elements can go on any cushion. The instruction manuals are universal, therefore that does not apply to the new models.” Given that they maintain multiple different manuals online and don’t print them anyways, they could have done a slightly better job with manuals, but oh well.

Installation

Airbags

2008 Subaru Impreza comes with SRS sidebags installed on window side of each seat, and therefore, before removing seats (which will involve disconnecting the airbag wiring), it’s important to disconnect the battery (the installation manual mentions it as well) and wait for a few minutes, to avoid having to go to a dealership to fix “Airbag Warning” light. I’m no mechanic, but as I understand it, car’s computer(s) test airbag system and if they find one of the airbags not “online”, warning light is lit, and even if the bag is reconnected later, the system is considered compromised and needs the be checked.

Upholstery

After disconnecting the battery and removing the seat (which in Subie is attached to the body via 4 bolts), the next step is to open the upholstery for both bottom and back cushions. The manual suggests disassembling the seat to separate the back and the bottom, but I didn’t feel like having to deal with the springs and sliding mechanism (mind you, this Subie has manual adjustments, not electronic ones), so I simply started lifting the seat covers hoping to be able to insert the pads, once I get access to most area of each cushion.

Here is the view of the bottom of the driver’s seat with covers lifted.

Seat Cover Removed

The stitching on the seats (which keeps the covers from sliding) is attached to the seat springs using small metal rings, known as hog rings, which need to be removed. I’ve never dealt with upholstery, and frankly, I found the process a real pain the butt, but eventually I figured out a way to do it using pliers (the installation kit included hog ring pliers, but I couldn’t figure out how to use them, nor was the tool’s handles were large enough to produce enough leverage). When putting the seats back together, I used zip-ties instead of hog rings, as metal hog rings would conduct electricity to the spring, which in best case would mess up the flow of electricity, and in worst case cause a short.

Fitting

The pads can be shortened (I ended up cutting the pads for the “backs” of the seats), but not cut in width – they are about 11 inches wide. If the pad’s placement happens to be under a stitch line holes may be made to place hog rings (or zip-ties) to connect the stitch line with the springs of the seat. One of the stitch lines on Subie’s seats is parallel to lateral axis, so one way or another, I’d have to have heating pad going through it, which means having to make at least two holes in the pad itself. Manual describes the process of making holes which is fairly easy to follow.

After cutting the holes and pulling the wire to the back of the seat, I placed the pad and started to pull off the paper that protects the sticky “sides” of the pad.

Bottom Pad Being Installed

With the pad placed on the seat cushion, it’s time to put everything back together. First things first – prepare the new “hog rings” – zip-ties:

New "Hog rings"


Before fully closing the bottom cushion, I switched to the back of the seat. The steps are the same: lift the cover, place the pad, close the cover. In my case, I had to shorten the pad in order to fit it in the seat. Here is marking the pad before cutting (you can see a faint line made by pencil on the pad).


Makrking The Back Pad

I chose not to fit the pad all the way to the top of the seat because that would require removing entire cover, which, in turn, would make me disassemble the seat. I figured most of the heat is felt in the lower back anyways. Here is the cutting


Cutting The Back Pad

And here is the placed pad before putting the cover back on.


Back Pad Placed

Here is the view of the SRS bag. Proceed carefully, try not to drop the seat onto that side 🙂


SRS Airbag

Here is the view of the wires run in the back. I ran wires from both pads to the side and under the bottom cushion’s flap.


Running The Wiring

Here is what the driver’s seat looks like at the end – you can see two black wires coming out from under the flap. The passenger’s seat is very similar, but it also has a sensor, so wiring is a little more convoluted.


Driver's Seat Bottom View
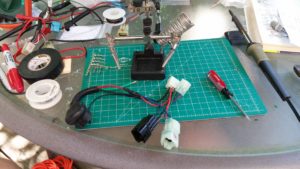
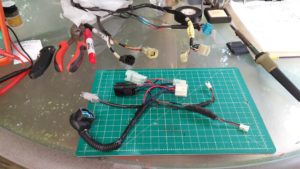
Wiring

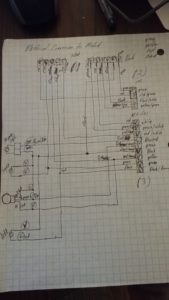
The wiring harness is a relay unit which has one 2-wire power connector, one 3-wire switch connector, and two 2-wire pad connectors. pad connectors are by far the shortest ones (about 12 inches or so), and power and switch connectors approximately 40 inches. I initially thought of placing the harness itself on the seat itself, since the pad wires are the shortest ones,  and running the wires for power and switches from there. Unfortunately, the connectors on the power and switch cable are much on the opposite side of the wires from the relay unit, which would mean that they would end up somewhere underneath the central console, and if I ever had to remove the seats, I’d have to get in there in order to disconnect the wiring. Because of this, I placed the relay unit under the floor with pad wires being connected to the seat. Their length was just enough to support the full range of motion of the seat, and now to remove the seat I have to disconnect the pad wires. This takes care of the seat wiring, but still leaves out the power and control wires. While both of the wires are long, the connectors are located differently – control wire connector is about 6 inches from the switch itself while power connector is about half-way through the length, placing it under carpet on vertical side of transmission tunnel under central console. Maybe a small nitpicking, but I would prefer if the power connector was next to control connector which would make it accessible once the central console is lifted.


Harness Placement

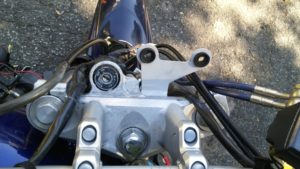
Subie comes with placeholders for the heated seats switches on the central console, which is where I decided to place the switches. Eventually, I’d like to get the stock switches, but for now I went with the ones provided with the kit. Luckily, armrest also contains cigarette lighter socket, which perfect for tapping into for power (it’s inside the armrest, so will most likely be used for charging an ipod or something similar, without much consumption).

2-stage Switches Installed

Here is the view of the final result:


Final Result

Tools

I ended up not using the installation kit provided apart from the wire tap-ins. Here are all the tools I used:

  • Wire cutters
  • Insulation Tape
  • Flat Screwdriver
  • Philips Screwdriver
  • Pliers
  • Knife
  • 12mm socket
  • 14mm socket
  • Scissors
  • Zip-ties
  • 10mm wrench (to disconnect the battery)


Tools Used

Lesson of the day: “Invest into good quality tools” – the old pliers that I had (got them from one of those cheapo toolkits) broke when I tried to use them to remove the hog rings.


"Invest Into Good Quality Tools"


Use

After putting everything back together, I tested the seats with… well, my own behind. The seats take some time to warm up, but the heat is definitely intense, I would think that it’s even more intense than “stock” heaters on my 2005 Saabaru. I got an impression that the second time the seats heated up more quickly than the first time I turned them on, but it may be an illusion – I will monitor more and will report the observations here.

Conclusion

Overall, I am happy with the kits – it looks like they are well made, the company shipped them quickly, answered my questions expeditiously (always wanted to use this work – ever since I’ve seen Oscar with Sly) and installing them was fairly easy. I would recommend this to people who are comfortable with small DIY projects and know how to work with automotive electronics.

Here is some nit-picking:

  • An order confirmation email when the order is placed is a must – come on, people, it’s 21st century
  • Manuals leave much to be desired – if you maintain them online, it’s not that difficult to update them – even if you have multiple models
  • “HTML format”??? really? it’s a collection of pictures! HTML should be searcheable
  • Connectors on power wiring could be closer to the end of wire (away from the relay unit) – this one is due to my placement, YMMV
  • “Installation kit” I found useless


Service Review: NY Airport Service Shuttles

In short, New York Airport Service which I used to get from Manhattan to LGA or JFK has deteriorated in its service quality to the point where I would not recommend anybody to use it.

In the past two years, whenever I had to fly out of LGA or JFK, I used NY Airport Service (NYAS) from Grand Central. For about $20 you can get to JFK in about 40 minutes (depending on when you fly out, of course). The buses were not the cleanest, but they ran on schedule and picked up passengers from Grand Central (corner of 42nd street and Park Avenue). I never had to wait for more than 10 minutes – as soon as particular bus arrives, they would let you load your luggage into the bus and take a seat. Tickets are collected quickly, and off you go.

Recently, I had to fly out to Chicago for an interview, and having to fly out of LGA, I followed the established routine – book the shuttle online, take a train to Grand Central and walk over to the corner of 42nd and Park. For some reason the buses looked newer, which I took as a good sign. Alas, my joy was short-lived – apparently the buses I saw belonged to a different shuttle company and I was told to wait inside (there is a small ticket location on Park Avenue side). There I had to wait for 20 minutes before the buses that “are not here yet”, according to a man who was apparently in charge. It should be noted that in the past people who worked for NY Airport Service wore uniform – this gentleman wore regular suit and tie. 25 minutes later, the buses were still not there, at which point people waiting in line started expressing their concern, to which one of the NYAS staff replied with simple “they are not here yet, do you want your money back?”. Not exactly the communication you’d hope for.

Another 5 minutes passed by and we were told that the bus is here and we can board. Strangely enough, the boarding was not on Park Avenue sidewalk, but “there behind the corner”, on 41st street. When the crowd, which was already wondering if it should have spent extra and just get a cab, made it to the said location, lo and behold, there was no bus and not even a uniformed staff to direct us. Another 5 minutes later waiting while periodically running back to the ticket booth, and we finally here that the “bus” is here. A small side-track here – if you go to NYAS website, in the center of the page you see a picture of Motor Coach Industries Detroit Diesel series 60 bus – and up until recent times, those are exactly the buses they were running. What we saw, unfortunately was a van. Granted, it was newer, but still it had just enough space for us.

Once we loaded up into the van, we were puzzled to hear the driver of the van argue with staff member as to where he is going. According to the driver he WANTED to go to JFK, despite the fact that passengers that were already loaded were going to LGA. Eventually, the driver was convinced that he needs to go to LGA, at which point we started started moving and collecting the tickets. in the process it became clear that out of 7 passengers, 5 were going to LGA and 2 were going to JFK!

One of the passengers told us that apparently NYAS’ contract expired (not certain which contract it is) and now they use vans instead of buses and pick people up in a different location.

I’m sad to see a good service go down the drain, but it is obvious that NYAS dropped the ball. I don’t think I’ll use their service anymore.

Site Recommendation: Free Online Private Pilot Ground School

As I was searching for reviews of different private pilot study kits (Sporty’s, Jeppesen, ASA, King, and others), I bumped into this:

Free Online Private Pilot School.

What a find: lots and lots of information available for free. It’s divided into categories (Airplane, Airmanship, Weather, Navigation) and then into topics, each topic containing multiple articles. By definition, I’m not an expert (otherwise I wouldn’t be looking), but it appears to cover all of the required material. I’m still going to purchase a course eventually (whatever the flight school uses), when my financial situation allows me to start going into actual training, but for now, this is definitely a good read to prepare myself.

HID lights “out”

Last Monday, while riding from train station around 7 pm, I got a strange feeling that something was “off”. The brakes worked, the bike handled well, but something was “off”. Only when I made it home and pulled the bike backwards into it’s spot on the parking lot, did I realize that my HID lights were off. I tried restarting the bike, checked the fuses and tried couple of the connectors that I was able to easily access without taking the fairing off to no avail. The “angel eyes” would not turn on either.

During the week I did not have time to take the fairing apart to inspect the wiring and try to figure out what happened. On Saturday morning, as I was preparing my tools to go downstairs to troubleshoot the lights, my one-and-only told me that my “blue lights” look like they are on. Now, this made me scratch my head – while technically, the angel-eyes had separate power feed, and me probably leaving the switch “on” accidentally, it’s a little strange for the lights to just come on. I went downstairs, and, indeed, saw the “angel eyes” on. I turned them off and tried to start the bike. Sure enough, they must have worked for a while because the battery was almost drained.

When I finally started the bike (it’s nice to live on top of a hill), the HID lights did not come on, and nor did the “angel eyes”. After running the bike for a while and letting the battery charge, I took the entire front fairing off and inspected the wiring, disconnecting and re-connecting the wires, and doing what I should’ve done when I put all that wiring together – drawing a schema of new wiring I put in place when upgrading to HIDs. Here are the findings:

  1. Connectors on the kit are not very good – I found water in one of the connectors (hi/low servo feed). Also, as I found out after putting the whole fairing back together, the other connector would break the connection when i moved it. Replacing connectors with something more solid is definitely on the winter “todo” list.
  2. “HID Wiring Harness Controller” unit (the controller that i mounted on the right hand side of the fairing performs “hi/low” switching w/o a problem and clicks when i feed the power to the main power input.
  3. Shielding on H4 connector (which I bought from AutoZone to combine hi and low feeds from FZ6 stock H4/H7 configuration) dried out and fell apart completely.

After brief checking and visual inspection, I put the fairing back on the bike and decided to call it a day – to be honest I became very frustrated with the fact that not having headlights will prevent me from riding these last beautiful days of the season.

Thoughts:

Even though the controller unit “clicks”, given that probability of both ballasts going out at once is somewhat low, I suspect that controller unit is to blame. I’ve ordered a similarly-looking control unit but it will take a few weeks to come from China – if I can fix this for $13, it’s worth it.

Overall, looks like moisture is getting into the connectors, and possibly could get into the controller unit. This is not good news. I’ll have do a more thorough testing of the controller and see if it still passes the power to the ballasts.

On a more grand scale, given the findings, I am thinking more and more whether it’s worth going to a more expensive (and higher performance kit). At the end of the day, you get exactly what you pay for, and lighting on motorcycle is extremely important. If i cannot “shape up” this kit by replacing the connectors and control unit more weather sealed, I may go for something from this place.

Additionally, this makes me wonder whether or not I need auxiliary lights which would serve as enhancement and backup for the main HID lights. As powerful as HID lights are, they are a relatively new technology and their operation involves multiple devices which adds multiple points of failure. I believe having an “old-school” regular light-bulb lights as a backup. My concern is – where to mount them and how – after a brief search and getting a quick list of possible solutions from PIAA and Hella, on average, the lights are about 4-6 inches in width, and FZ-6’s mounting points for aux lights are limited.